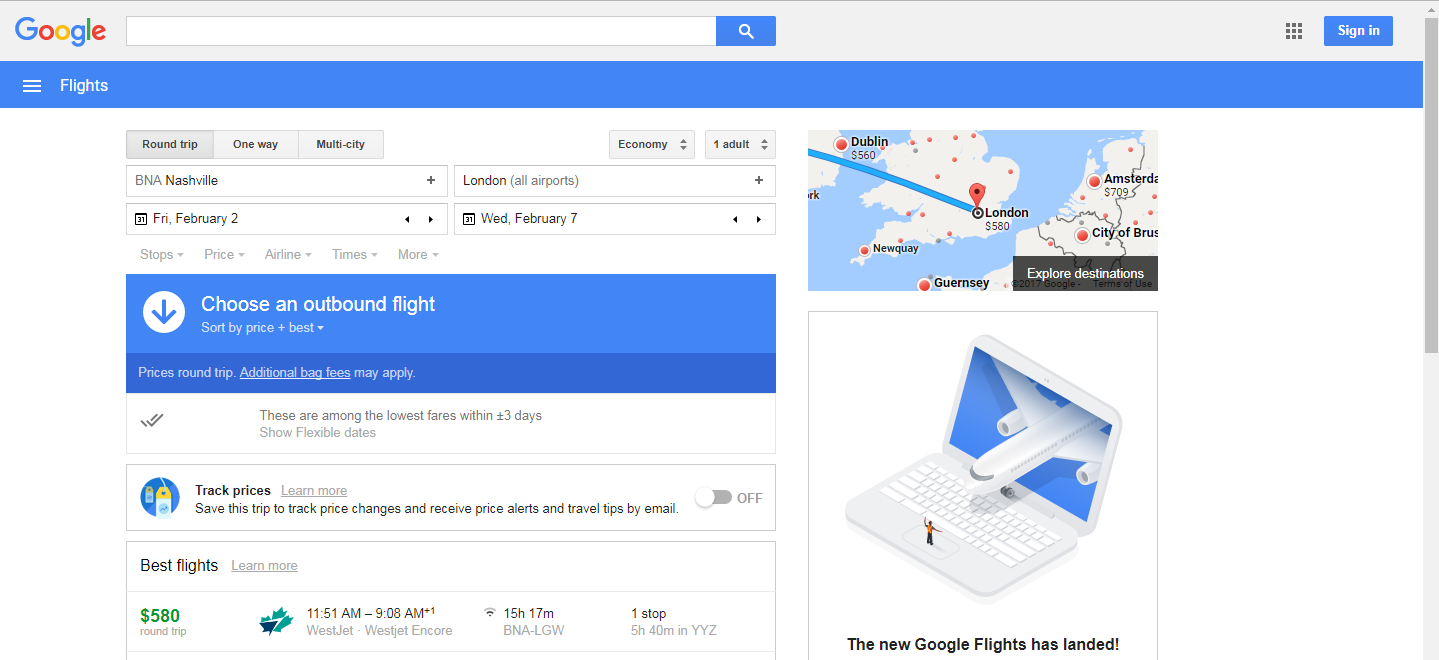
Flights in February from Nashville to London from $580. Several dates in the $500s.
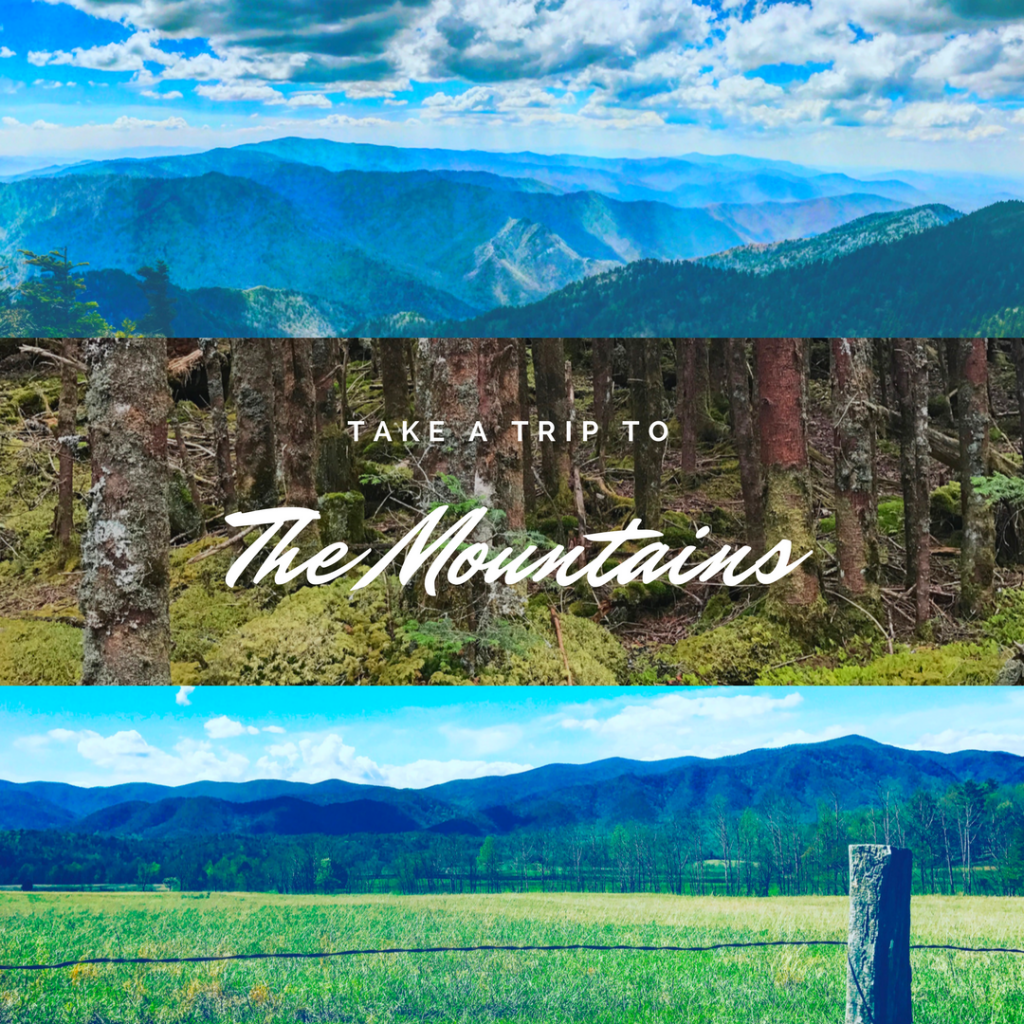
the best trips don’t have to be far from home.
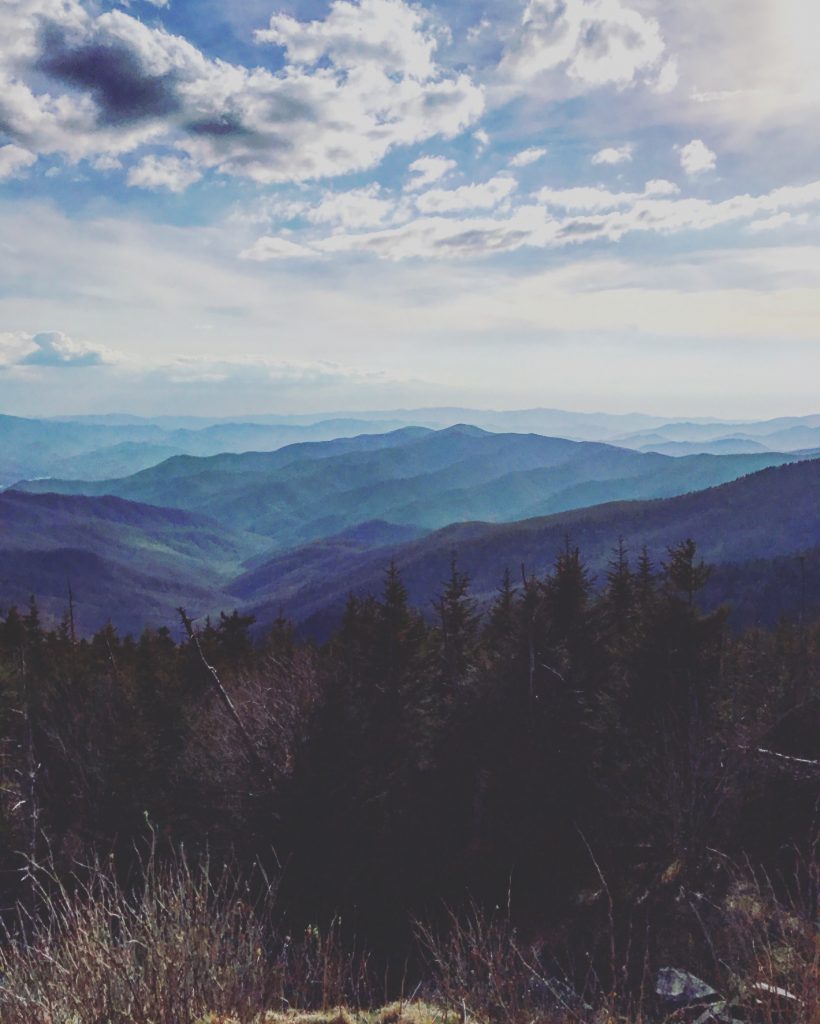
Sometimes, taking a short trip to the mountains can open your eyes to the beauty that’s right in front of you.
Trip Outline:

Day 1: Drive to Tennessee, Antique Shop, Relax at the Cabin

Day 2: Hike Mount LeConte, Relax at the Cabin

Day 3: Recover in AM, Explore/Shop in Townsend, Hike Abram Falls, Relax at the Cabin

Day 4: Drive through Gatlinburg/Pigeon Forge, Walk to Clingmans Dome, Hike Andrew's Bald, Relax at the Cabin

Day 5: Drive Home
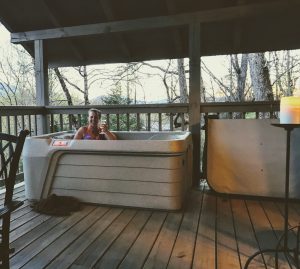
From Southern Illinois, where my mom and I live, it is about a 6-6.5 hour drive to Townsend, Tennessee. For some, that may be far, but for us it’s easy compared to our normal 13 hour drives to visit family in Austin, Texas. I had heard many people from southern Illinois talk about going to the Smoky Mountains my whole life, but it was always Gatlinburg, or Pigeon Forge. Townsend is considered the “quiet side of the Smokys”, so we figured we would give it a shot. We left about 7:00 am and had an easy drive east for our quick mom-daughter holiday. Also…if you didn’t know…Cracker Barrel is a must for road trips in the U.S. It just is.  The cabin was easy to find and exactly as pictured in the photos. It was a steep climb up a gravel road in a semi-residential area nestled amongst other cabins close by, but just far enough to feel secluded. We were on a tight budget and were looking for something around $100 per night or less. I started my search on Air B&B and HomeAway, but wasn’t having much luck with our budget. So, I just did a google search and that’s where I found the Riverview cabin. As usual, I searched and searched and searched for the right one. Read reviews, looked at photos, and it took me a few weeks to find the right one. At $99 per night this was it. It had a full kitchen, bathroom, fireplace, hot tub, large deck, gas grill, a place for outdoor dining, large bed, wifi, TV…you name it. It was CLEAN and very well maintained. It even has a walkway down to the river where you can sit and have a fire, or in the summer you could get in the water! It wasn’t quite warm enough for us to get in, but in the summer it would be PRIME for laying out on the rocks and enjoying the water.
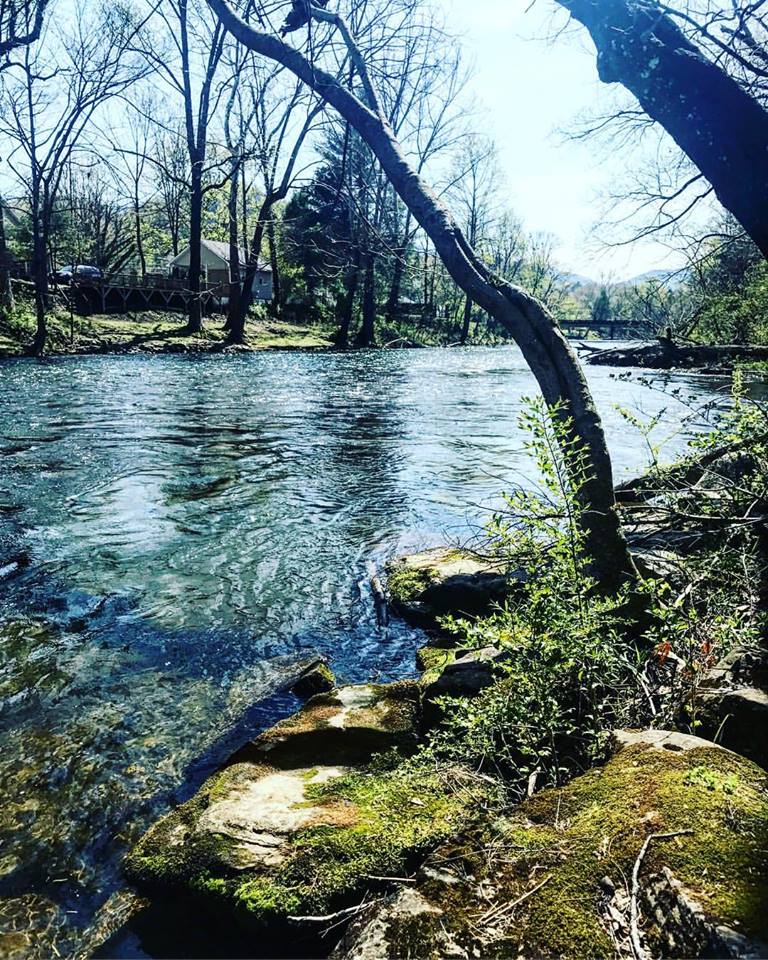
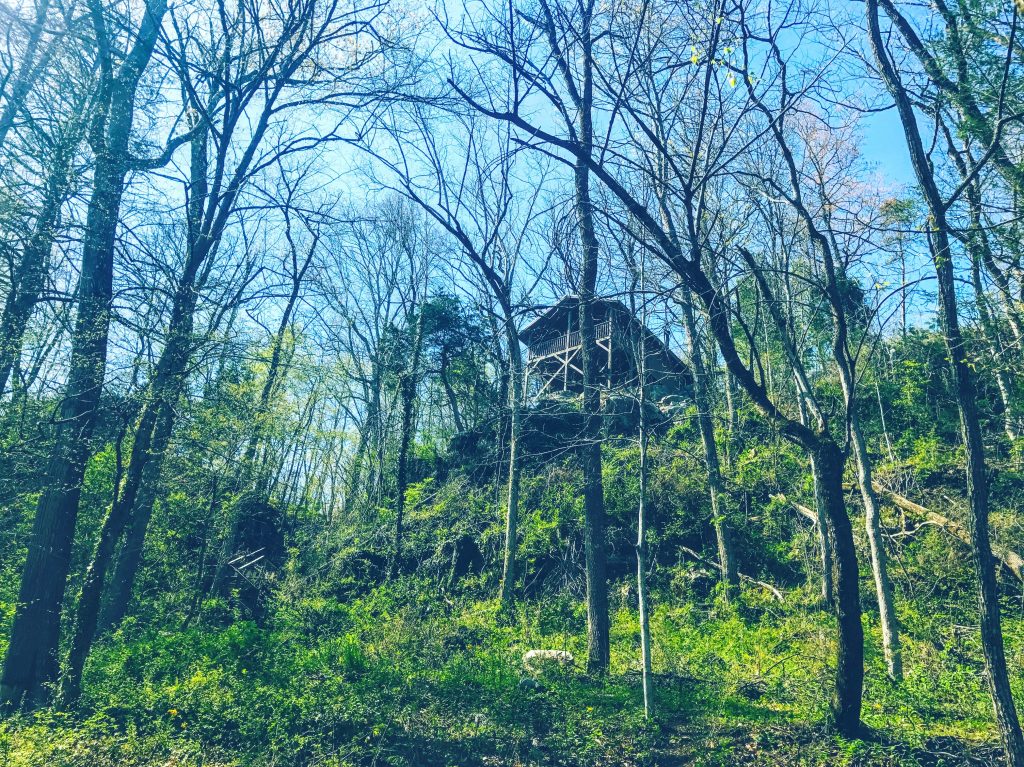
 https://www.beartootin.com/176660/
Day 1
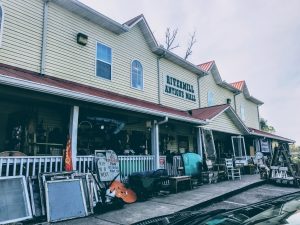
Townsend was exactly how I imagined it. A small, quiet, mountain town with curvy roads, antique shops, restaurants with signs boasting about their home cookin’, and lots of cabins. After we unloaded the car and got a bit settled in at the cabin it was around 4:00pm. Not quite enough time for a hike, or the right time to eat supper, but enough time to get out and do some antique shopping. My sister claims that I am a hoarder, but I beg to differ. My husband and I LOVE antiques. We love looking at them, finding them, learning about them, refurbishing them, visiting new shops in new towns, but most of all, we love seeing them in our home. I know what antique store I purchased all of them at and I probably have a story about each of them too. Antiques are a pretty big part of my life. Anyway, Townsend and Maryville (the nearest town, right off of the interstate) are FULL of antique shops. I was actually counting them on the drive in. We went to a few, I found some things (of course) and we headed back to the cabin to start up the grill, get in the hot tub, have a few drinks, and relax in our mountain cabin.
Day 2
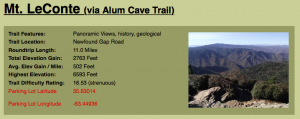
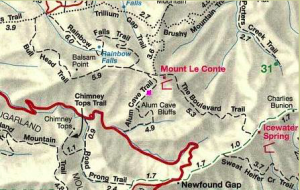
The second day was the day I had really been looking forward to and essentially what I based this entire trip around. A colleague of mine who is an avid hiker and kayaker was telling me about how often she travels to the Smokys. She was of course, shocked that I had never been there and proceeded to tell me about this trail that she recently hiked and how beautiful it was. She texted me the link to the trail information and and when I saw the photos, I was sold. I had to do this trail. So, I immediately proposed the idea to my mom and sister and they were on board. Trip to the Smokys and Mt. Leconte trail it was! Below you can see the map and elevation profile of this trail. It is one of the most challenging trails I have done. I wouldn’t put it in the category of “all ability levels”, but I also wouldn’t say it’s off limits for people don’t consider themselves hikers. My mom and I hike frequently, but my younger sister does not. She was worried at first when I told her it was 11 miles up a mountain, but she did it….she did the whole thing like a champ. So, it’s a tricky one to label.
Note: This hike will require you to take extra water, food, and hiking poles(if possible). I packed a 2.5L water bladder, sandwich, chips, a couple Larabars, and and apple (I ate and drank it ALL). A bottle of water just won’t cut it on this one. I finished 2.5 liters just on the way up and filled the bladder from the well at the top of the mountain. So cold and so delicious, by the way.

 http://www.hikinginthesmokys.com/lecontealum.htm
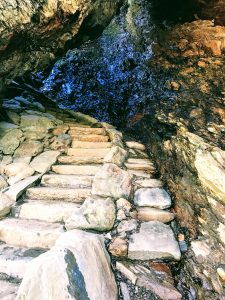
Although we got up really early, we somehow managed to get a late start on the hike. I think it’s because we were enjoying our coffee on the deck for a little too long. We stopped at the Sugarlands Visitor Center to grab a map and make sure we were starting at the right spot. The ranger informed us that most people do not hike all the way up and back in the same day, but we decided to do it anyway and we got on the trail at about 10:45am. The beginning of the trails follows the water and is highly trafficked. I was actually somewhat disappointed at the beginning because it was so crowded and felt like a tourist destination because of all the people. There are a few log bridges to cross and a really neat stairwell carved out of the cave. This part of the trail would be great for families to do as it is easy and there are lots of places for kids to explore along the trail. You can turn around after the stairs in the cave or you can continue on.
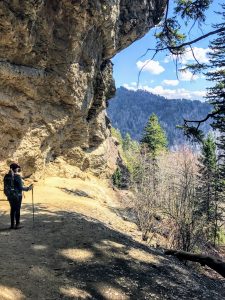
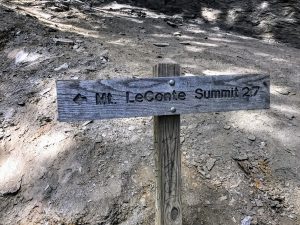
The second spot where you can turn around is also in a cave(a very large cave), and has incredible views! Great place to stop and have a snack, snap some photos and relax for a minute if you’d like. We saw lots of people having a picnic and just enjoying the views. There is a sign that will direct you to the left if you want to go to the Mount LeConte summit.
Once you turn left to hike up to the summit, it starts to get tough. About this time is when my mom had to find a hiking stick and my sister asked to use one of my trekking poles. Trekking poles make a HUGE difference in my level of endurance when hiking, they help my stability, provide extra grip when needed, and also prevent my hands from going numb after hanging down for so long. I was very thankful I brought them on this trip because they helped me get up those 1000 feet to the summit. From the left turn, it continues to get steeper and steeper. The landscape begins to change, the trail gets more narrow, and depending on the weather, you might see some snow at the top.
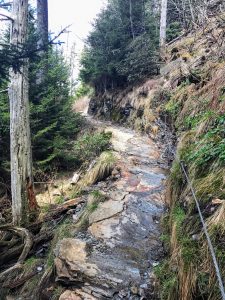
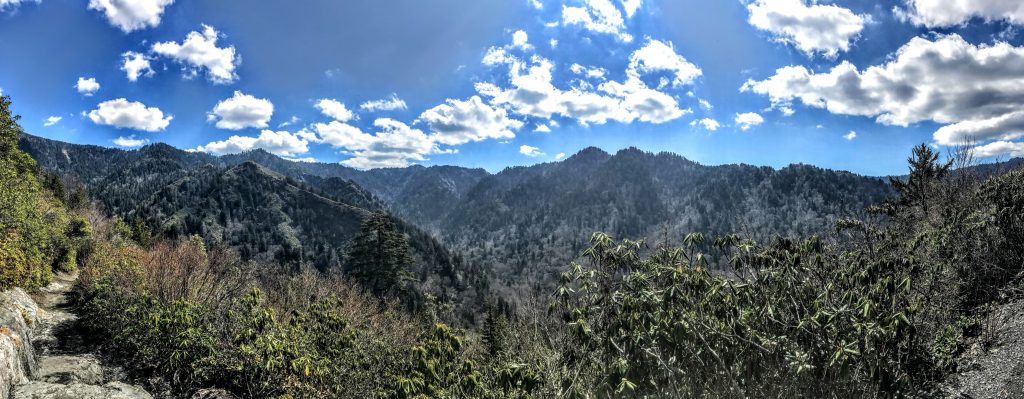
It starts to feel like you might not make it. We kept passing hikers going down that were telling us, “you’re almost there!” I think almost there is pretty subjective because we weren’t really almost there.Water was getting low, the temperature was getting cooler and cooler, we were getting hungry, and we were getting tired. As we went up the mountain, most spots were like the one pictured above where you had to hold on to the cable to get yourself up and keep yourself from falling on slippery rocks. In the picture below, there was a very tiny ledge you had to walk across (with a cable) to continue on the trail and I stopped here to get a really beautiful panoramic photo.
The entire way up, the views are breathtaking. I feel very fortunate that we were there when the weather was so perfect. I have heard that hiking this in rain, or when there is more snow on top is really tough and can be dangerous. In addition, if it is cloudy, the views aren’t as good. We had sunny skies, mild temperature, and nice cool breeze….a hikers dream come true.
Travel Tip: You can’t change the weather. I repeat, you CANNOT change the weather. So, always be prepared with a rain coat, layered clothing, and a good pair of hiking footwear.
Alright, so….we did finally make it to the summit even though the park ranger told us we wouldn’t make it and even though we felt like the top would never come. When you first arrive, you will see the LeConte Lodge. Note that this is not the spot where the best views are, but you should definitely walk around and check out the lodge. It’s really neat. There is a small sign on the right that will direct you up a bit further. You weave in and out a bit through a small path and it opens up to a large rock where you can sit and see for miles it seems. This spot is known for it’s perfect sunset viewing location. There were a few people relaxing, some eating lunch, a couple of guys having a cigar and drinking some whiskey, and us. It felt so good to have done something that’s a “bucket list” item when it comes to the Smoky Mountains. We did it. We stood at 6,593ft. The 3rd highest peak in the Great Smoky Mountains National Park. Together. Having my mom and my sister by my side was a really incredible feeling. I felt so lucky. So happy I planned this trip. So grateful that I have family to experience traveling with and so at peace with my life and how far I have come. I think hiking does that to you. It gives you this incredible sense of accomplishment and fulfillment, but also a sense of humility and thankfulness in the presence of nature and all of it’s wonder.
↓THIS is the view from the top↓

Note: If you want, you can hike up to the top, stay at the LeConte Lodge for the night, and then hike back the next day. Most of the people we ran into had done that or were doing that. However, I did hear from the hikers that booked the lodge for the evening that it is very difficult to get a reservation so make sure you get one early! LeConte Lodge provides dinner for the evening and breakfast the next morning. Be aware that this is not a luxury cabin. They are one room cabins with no running water or electricity. There is a water basin for a sponge bath and a kerosene lantern for light.
The entire 11 mile hike took us about 7 hours. Getting an earlier start would be helpful because you could spend more time enjoying the hike and stopping along the way. This will take up your day, but it is worth it. Be sure to pack lots of water, snacks, and wear hiking-appropriate clothing and shoes. We returned to the cabin for the evening to relax, have dinner, and celebrate with a few beers.
Day 3
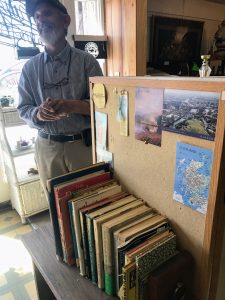
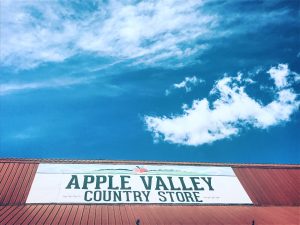
We were very sore from the Mt. LeConte trail so we decided to spend the morning relaxing at the cabin and spending some more time around Townsend. We starting the morning with coffee on the deck and headed to some more antique shops which is where I met Walter. There was this tiny antique store in a barn behind another antique store. My sister and I weren’t going to go in because I had already spent too much money on antiques, but we decided to go ahead and check it out. I found something, of course, and as I was checking out I noticed his little bulletin board with postcards from Scotland on it. I asked him if he had been to Scotland and he smiled and said, “oh yeah, that’s where I’m from!” You can imagine my excitement to tell him that I’d be visiting that summer. Walter liked to talk. He told us some wild stories about his family and friends from Scotland, how he got his visa, how easily his Scottish skin burned when he moved to the states, and liked to tell jokes. My favorite joke of his went like this after I told him we were visiting Edinburgh…”I’m actually from Glasgow, so of course I think it’s better than Edinburgh. Whenever I was feeling rather nasty, I would say to one of my buddies, ‘if you ever see a beautiful girl in Edinburgh…she’s a tourist!” It was so much fun chatting with him and it almost seemed meant to be that I ran into him at that tiny little antique shop in Tennessee. We finished up the afternoon at the Apple Valley Country Store and had their “world famous” chicken salad sandwich and pulled pork sandwich then headed to hike Abram Falls.
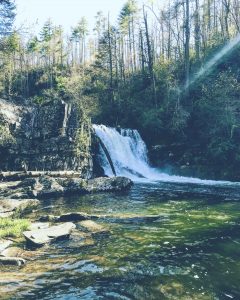
Abrams Falls is a 5.2 mile trail in Cades Cove. It is well maintained, heavily trafficked, and fairly easy to hike. It is very rocky, so proper footwear is a must and remember to hike carefully as there could be snakes crossing the trail (my sister almost stepped on one). Most of the trail follows Abrams creek, but the creek itself is inaccessible in most spots due to overgrowth and very slippery rocks. The trail is not a loop, so you hike to the falls and turn back the same way you came in. Unfortunately, you can’t swim in the falls due to the danger of the undercurrent, but you can get pretty close to the waterfall or dip your feet in. You should give yourself extra time to get to the trail head because you have to drive on the 4.8 mile, one-way Cades Cove loop to get to the trail head. This isn’t necessarily a bad thing because the scenic drive is beautiful, but it’s not for those who don’t have much time. Although there are frequent pull of points, people driving this path are there to enjoy the scenery and are therefore driving slow. There are also many stops along the road to pull over and park for photos, get out and stretch your legs and look at the mountains, or explore the historic log buildings and houses (also free).
Day 4
At this point we had hiked/walked almost 20 miles in 2 days. Although we were all a bit worn out, we came there to hike and explore the mountains so we planned another hike for our last full day. We decided to spend the morning taking a scenic drive from Townsend through the park into Pigeon Forge and then through Gatlinburg to check out those areas. As I had heard, they are quite touristy. If you are looking for a place near the Smoky Mountains where there are a lot of restaurants, shops, and things for kids to do, both Gatlinburg and Pigeon Forge are great for that. However, if you are looking for something more rustic and out of the hustle and bustle, Townsend or Wears Valley would be a better fit. The scenic drive leaving Gatlinburg led us to a small BBQ joint called Boss Hogs BBQ Shack that had some of the best pulled pork and BBQ chicken I’ve ever had (maybe even better than Texas BBQ…maybe). If you’re in the Pigeon Forge area, it’s definitely worth a stop for lunch. You gotta have BBQ when you’re in Tennessee. Trust me.

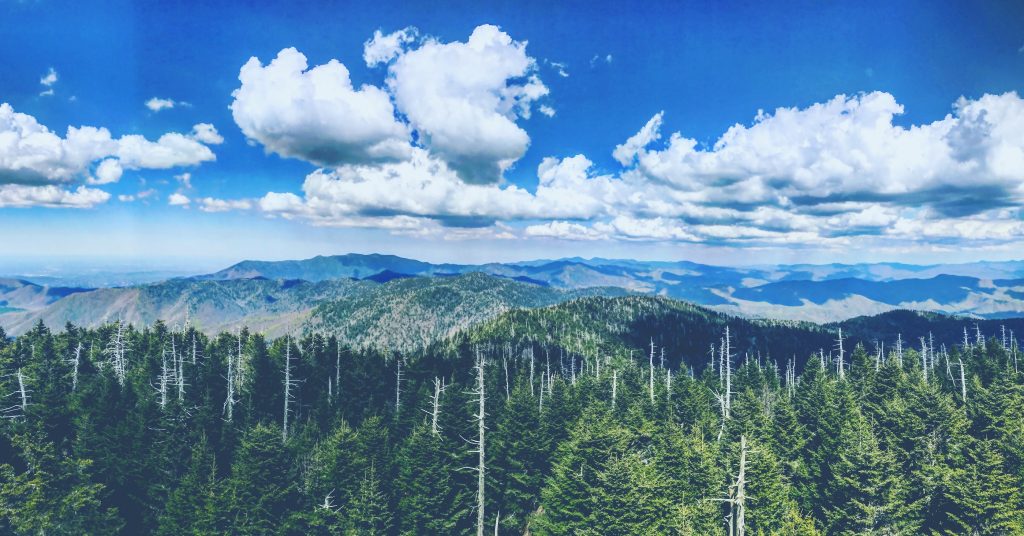
After that, we headed to Clingman’s Dome to see the 360° views of Tennessee and North Carolina from the observation tower. Sitting at 6,643 feet, this tower is not to be missed. The 7 mile drive up the mountain on Clingman’s Dome Road is a bit scary if you are afraid of steep edges, or winding roads (my mom got a bit nervous in the passenger’s seat). Although most drivers follow speed limit recommendations, some drive fast up and down the road, so use precaution and drive slow. Once you get to the top, you will see a very large parking area where you can access multiple trail heads, go up to the observation tower, and see where the Appalachian Trail passes through. The hike to the observation tower is only a half mile and is paved, but is quite steep. Take your time and bask in the views on the way up.
↓THIS is just one of the views from the observation tower↓
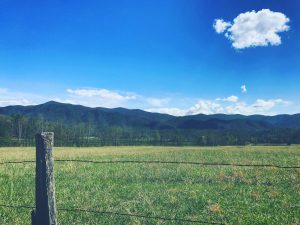
After being in awe of mountain views for miles, literally, we walked down to the Forney Ridge Trail to get to Andrew’s Bald. This is a short, 3.5 mile trail that goes through the rocky Forney Ridge, through fairytale like forests, and opens up to a large grassy meadow with high elevation views. At our time of visit, in early April, not much had bloomed on the bald yet, but I’ve read that it is quite beautiful in late spring and summer. Again, this trail was rocky and muddy in spots, so proper footwear is important.
↓View from the beginning of the Forney Ridge Trail ↓
Day 5
The day you have to go home is always bittersweet (more bitter for me, typically). You’ve had a wonderful time and want to stay longer, but you also miss your own bed. Let’s be serious. On this trip, however, it was sweet for me. I felt completely and utterly happy that I got to spend 5 days in the mountains with my mom and my sister. The weather was perfect, the cabin was exactly what I was looking for, there were beers to drink and burgers on the grill, the hiking was life changing, and I was already planning another trip back. The Great Smoky Mountains exceeded my expectations and made me realize that I didn’t need to go very far to have the perfect vacation. Take a trip to the mountains!
What to bring:
- Hiking Boots
- Trekking Poles(optional, but HIGHLY recommended)
- Raincoat
- Small hiking backpack for snacks and water (5-10L pack with 1.5-2.5L hydration bladder is perfect )
- Camera(all of these photos were taken with my iPhone)
Just Go….
***all photos are mine unless stated otherwise***
]]>
“You! You foul, loathsome, evil little cockroach!” -Hermione
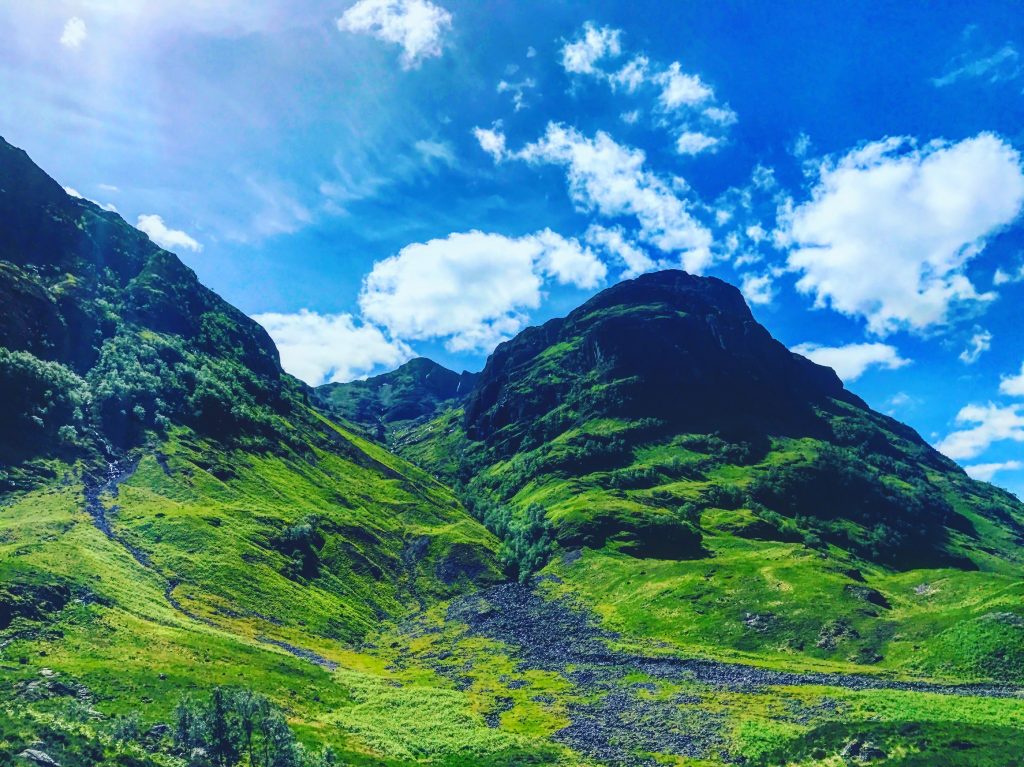
Glen Coe is one of Scotland’s most spectacular sights even for muggles! The famous glen (valley) is surrounded by mountains and was formed by volcanic eruptions and glaciers. Visitors flock here for the the incredible views, hiking, climbing, and walking. It can be found right on the A82 (you’ll actually drive through it) about 16 miles south of Fort William and there are two large parking lots. Get there early if you plan to hike, they can fill up quick! Glen Coe is featured as a backdrop in several Harry Potter films, but is probably most memorable in the Prisoner of Azkaban. Check out the scene where Hermione punches Malfoy. 50 points for Gryffindor!
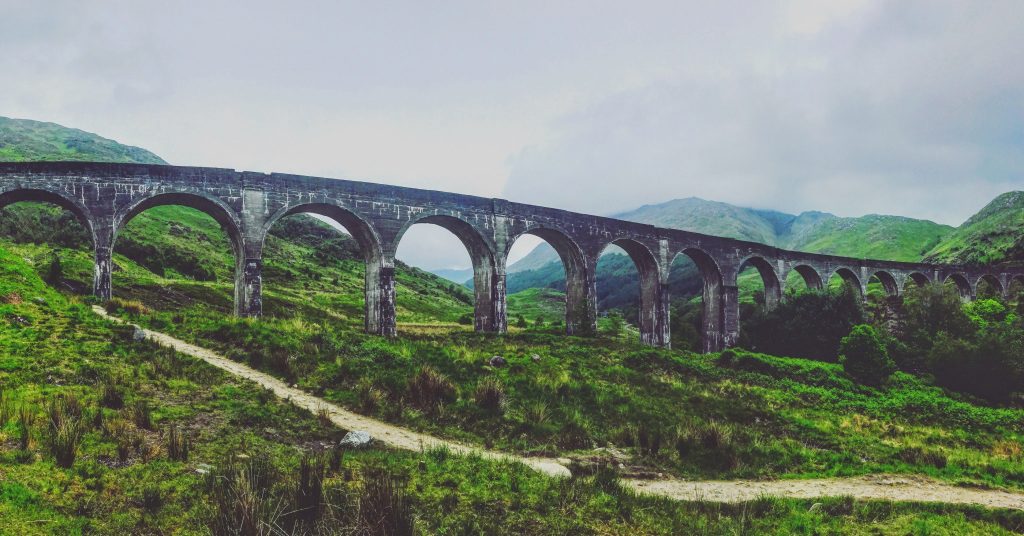
2. Glenfinnan Viaduct- Glenfinnan, Inverness-shire
“Ron, I should tell you…most Muggles aren’t accustomed to seeing a flying car!” -Harry
Even if you aren’t a Harry Potter fan, (gasp) you probably still recognize the Glenfinnan Viaduct. The Jacobite Steam Train (used for the Hogwarts Express in the films) crosses the 21 arches of the viaduct twice a day on a journey from Fort William to Mallaig. You can purchase tickets in advance and ride the train, or walk up on the Glenfinnan Viaduct Trail to view the steam train passing through Glenfinnan. Glenfinnan is about a 30 minute drive from Fort William and there are two car parks available near the visitor center where the trail begins, across from the Glenfinnan Monument and Loch Shiel. Give yourself enough time to drive, park, and walk up to one of the two viewing locations. If you arrive arrive by 10:30am for the first train and by 3:00pm for the second, you’ll have plenty of time to get in position to watch the Hogwarts Express pass through right before your eyes. It is truly magical.
(p.s. I cried)
3. Loch Shiel, Glenfinnan, Inverness-shire
“You need us, Harry.” -Hermione
When you stop to park your car at the Glenfinnan Visitor Center, you can walk across the street to see the Glenfinnan Monument. Glenfinnan Monument, at the head of Loch Shiel, was erected, in 1815, as tribute to the Jacobite clansmen who fought and died in the cause of Prince Charles Edward Stuart. The beautiful Loch Shiel can be seen throughout the Harry Potter Films as it was used for Hogwarts lake in certain scenes, where Buckbeak flies over in Prisoner of Azkaban and in Half-Blood Prince, in the background of the flying car scene, and where Harry, Hermione, and Ron discuss how they will work together to find the horcruxes at the end of Half-Blood Prince. Get there early before the other tourists arrive and you’ll have the whole beach on the loch to yourself.
4. Loch Eilt, Lochaber, Highland
“The owner of the Elder Wand must always fear attack,” said Ollivander, “but the idea of the Dark Lord in possession of the Deathstick is, I must admit…formidable.” -Mr. Ollivander
This eerie island is most famously known as the spot where Voldemort stands over Dumbledore’s grave and steals the elder wand in the final scene of Harry Potter and the Deathly Hallows Part 1. Go back a few books and you might remember seeing Hagrid knee deep, solemnly skipping stones (rocks in his case) across the water in Harry Potter and the Prisoner of Azkaban. The island sits on Loch Eilt and can be found along the A830 between Glenfinnan and Mallaig on the Road to the Isles. Once you leave Glenfinnan and head towards Mallaig, it is about a 30-45 minute drive from the Glenfinnan Visitor Center and you will see it on your left. There is a small space to pull over and park on the left side of the road and you can walk out to get a view of the island.

*photo taken from https://www.youtube.com/watch?v=elAVNTbBh9s
5. Steall Falls, Fort William
“The key is to concentrate. After that you just have to…” -Hermione
“Battle a dragon.” -Harry
When Harry battles the Hungarian Horntail dragon in Harry Potter and the Goblet of Fire, the majestic Steall Falls can be seen in the background between two glens when the dragon breaks free and chases him out of the Quidditch stadium. This picture perfect backdrop is also featured in various scenes during Quidditch matches. Steall Falls is closest to Ft. William and part of Glen Nevis. The Steall Falls trail is a low level, 2.25 mile enchanting walk through rocky mountainsides along the gorge that opens up to a large, grassy meadow where the falls take the stage. The trail head can be accessed by car via a single lane road that ends at the trail head parking lot. You can hike there and back in about 2 hours, or you can pack a lunch, bring a blanket, and spend the afternoon amongst the wildflowers.
6. Loch Etive, Argyll and bute
“He knows. You-Know-Who. He knows we broke into Gringotts, he knows what we took, and he knows we’re hunting Horcruxes.” -Harry
Scotland is filled with lochs (lakes). When driving the curvy backroads, there’s a good chance you’ll see one, if not many along the way. This almost 20 mile long loch can be accessed at various points from it’s southern most tip near Connel to it’s northern tip near Gualachulain. The spot that is featured in the Deathly Hallows Part 1 and the Deathly Hallows Part 2 when Harry, Ron, and Hermione are on the hunt for horcruxes is at the northern point by Glen Etive. In Part 1, it can be seen in the background when Hermione ties her scarf to the tree by their camp after Harry and Ron argue. In Part 2, it can be seen when Harry, Ron, and Hermione fall into the loch after their risky trip to Gringotts. If you are up for it, hike the Beinn Trilleachan trail for a spectacular view of the loch. The trail is a strenuous 5.5 miles and can be dangerous if the weather conditions aren’t favorable, but the views are totally worth it even if you don’t make it all the way to the top.
*photo taken from http://pynki.tumblr.com/post/39052443508/http-weaselette-com *
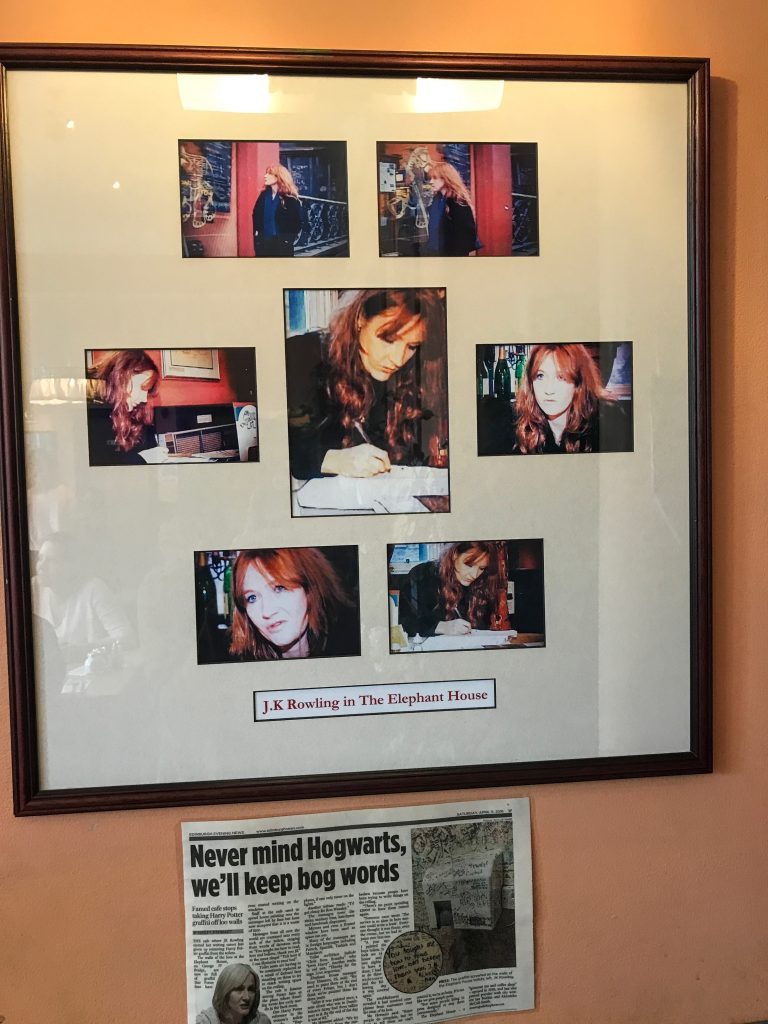
7. The Elephant House Cafe, Edinburgh
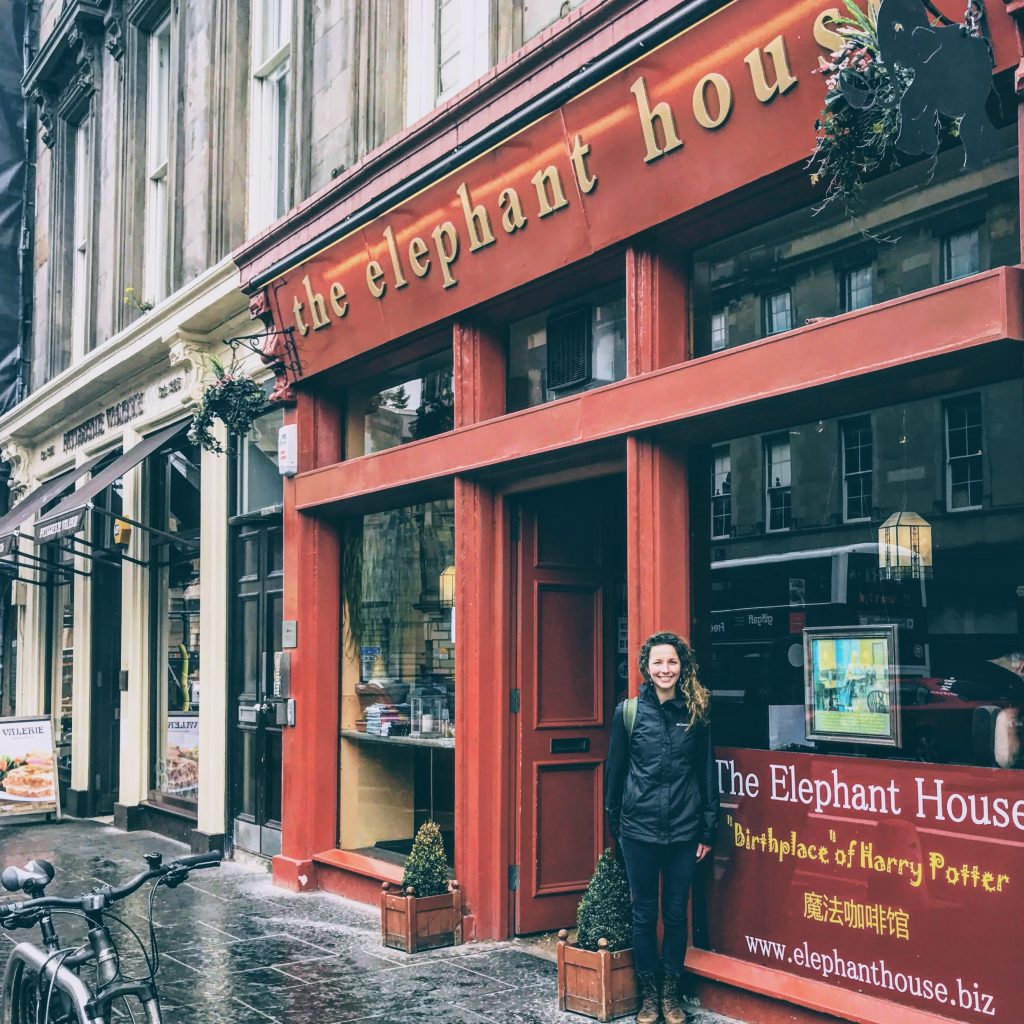
“And the idea of just wandering off to a cafe with a notebook and writing and seeing where that takes me for awhile is just bliss.” -J.K. Rowling
Edinburgh is FULL of magical places that were inspiration for the entire Harry Potter series, but The Elephant House was first on my to-do list. It is considered the birthplace of Harry Potter because J.K. Rowling wrote parts of the first book here, and in many cafes throughout the city. The Elephant House sits in the heart of Edinburgh’s historic area with views of Edinburgh Castle. Even though this is a major tourist destination and most always has a line, the wait is worth it. The food is incredible, the atmosphere is cozy, and the J.K. Rowling love is everywhere. From the fan graffiti in the bathrooms to the pictures of her on the walls, you’ll feel right at home as a Harry Potter fan.
8. Victoria Street, Edinburgh
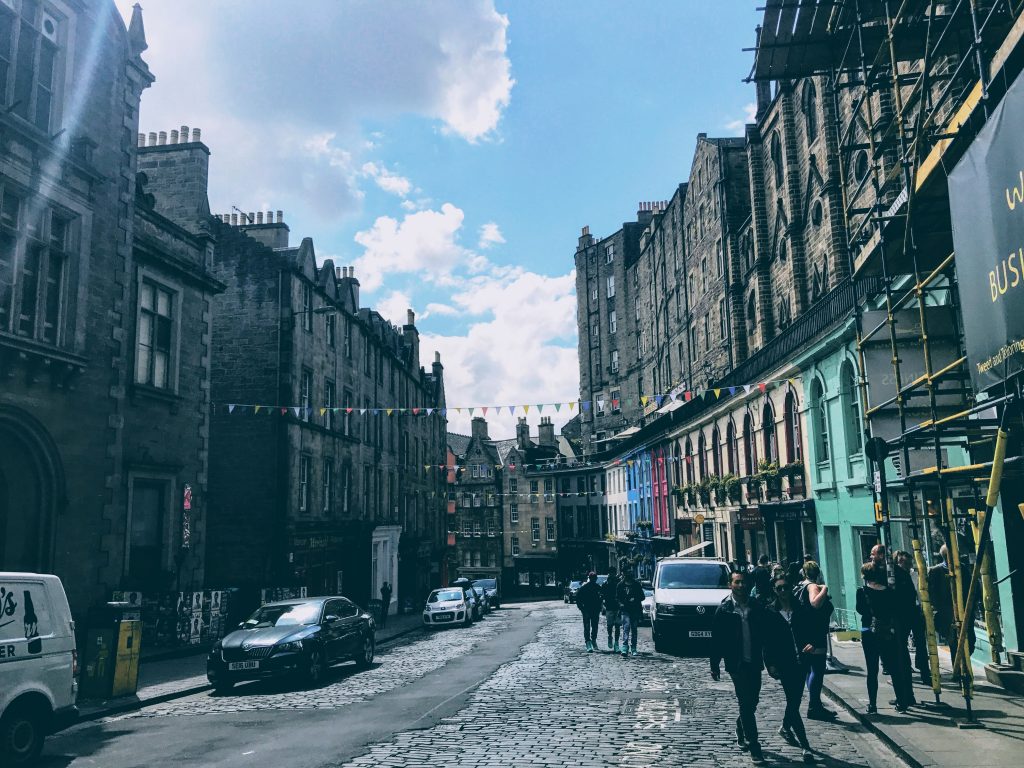
“Welcome, Harry, to Diagon Alley.” -Hagrid
After you’ve cozied up at The Elephant House for a bit, take a walk down Victoria Street. This vibrant, historic street is said to be J.K. Rowling’s inspiration for Diagon Alley. It is filled with small, quirky shops much like those featured in the boo. In fact, in the the early 90s there was a bank and a stationary store in the same spots that Gringotts and Flourish and Blotts are in the movies. It’s easy to see why Rowling was inspired by this street. The bustle of the city, the rooftops, the cobblestone… it’s truly magical.
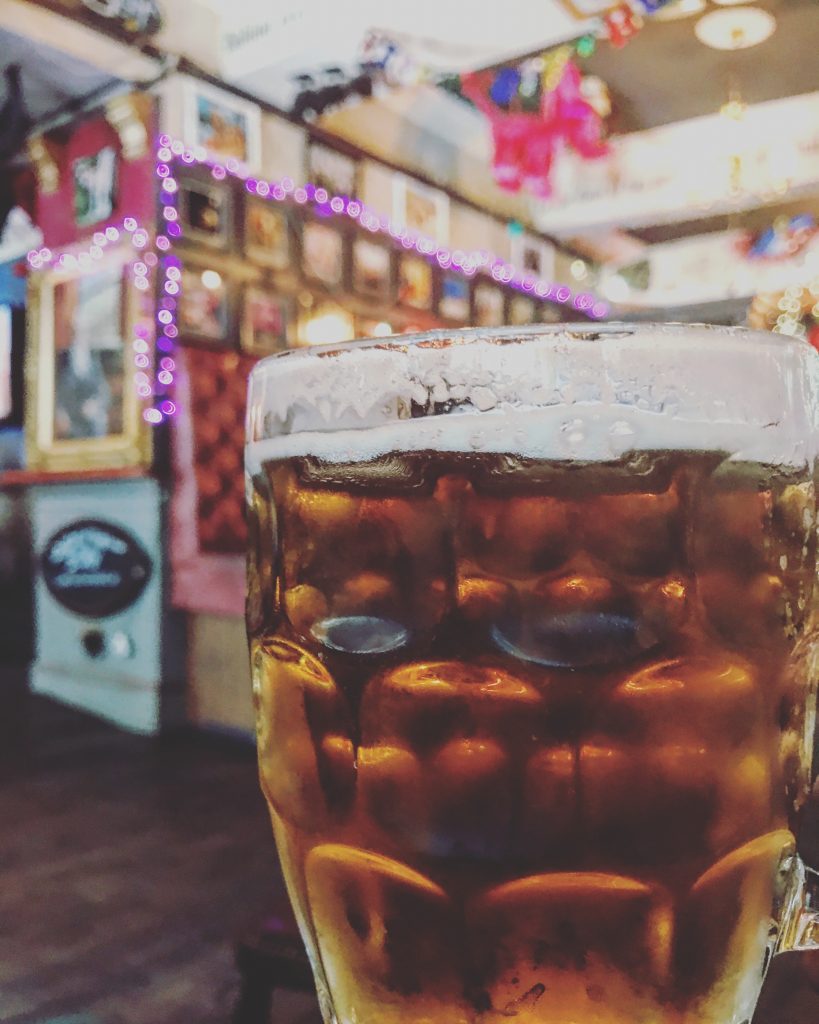
9. The Dog House, Edinburgh
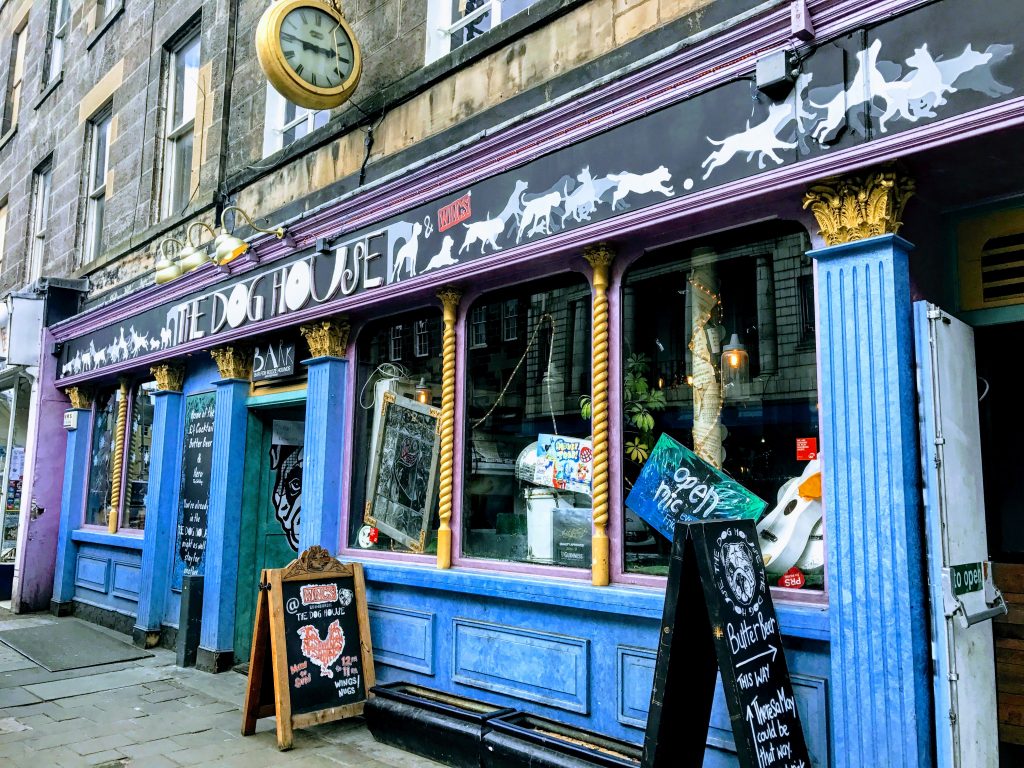
“Why don’t we go and have a butterbeer in the Three Broomsticks,
it’s a bit cold, isn’t it?” –Hermione
So, we’ve all wondered what butterbeer tastes like since we first read about it in the Prisoner of Azkaban. I know I did. Was it alcoholic? Did it actually taste like butter, or was it more like a butterscotch candy, or was it more like a beer? Well…I got to find out. The Dog House is a quirky pub near the University of Edinburgh and The Meadows that’s a bit of a walk from the old town, but worth it when you can relax on a couch with a big, frosty mug of butterbeer. Which by the way does, in fact taste like butterscotch. Don’t drink too much though, I think The Dog House’s butterbeer is a bit more alcoholic than what they were serving to students in Hogsmeade. The vibe is eclectic, the drinks are cheap, and yes it’s pet friendly. Cheers to that!
10. Edinburgh Castle
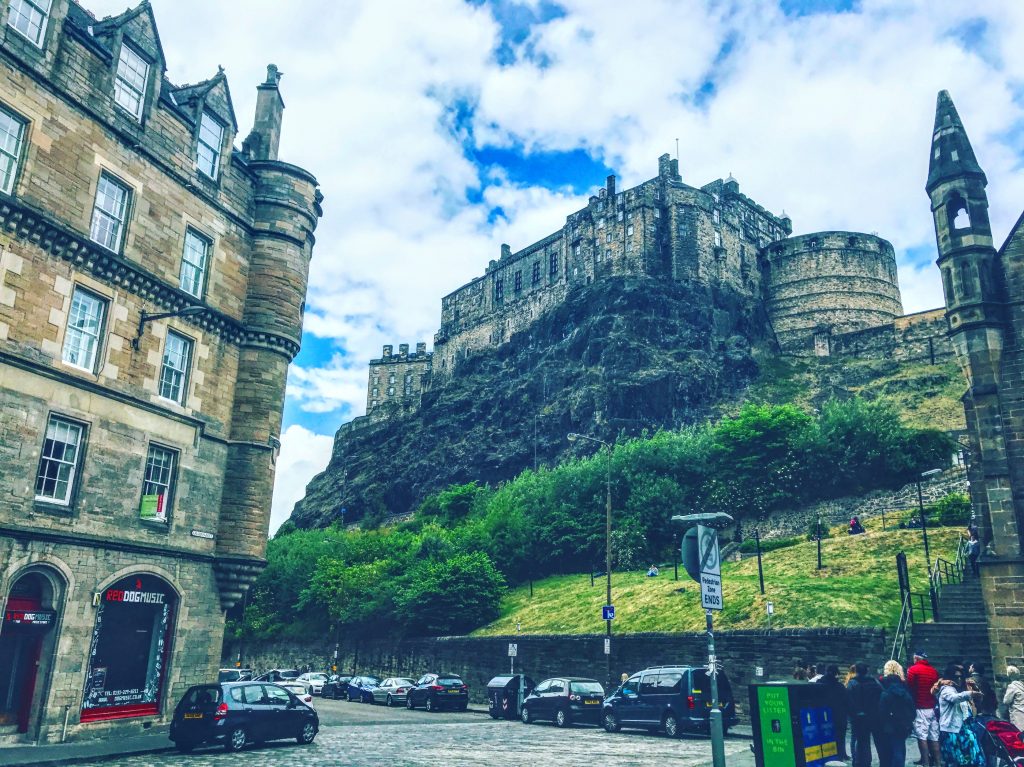
“Whether you come back by page or by the big screen, Hogwarts will always be there to welcome you home.” – J.K Rowling
A visit to Edinburgh must include a stop at Edinburgh Castle. It is easy to see why this castle is said to be Rowling’s inspiration for Hogwarts. Sitting atop Castle Rock in the heart of the city, Edinburgh Castle is hard to miss. You can see parts of it from almost anywhere in the city. The castle is a major historical site in the UK and parts of the fortress were built as far back as the 12th century. It is, of course, a major tourist attraction for muggles too, so plan for long lines and big crowds. You can walk around the castle grounds and gardens for free, or buy a ticket to take a tour. Whichever you choose, take a minute while you are admiring it to stop and say “Hogwarts is my home!” (in your best Harry Potter voice).
Just Go….
***all photos are mine unless stated otherwise***
]]>I remember laying in bed on nights that I had a long day at work and dreaming of Ireland. I can remember telling my husband, Jacob, how we’d hike mountains and see green for miles. I can remember feeling like I would walk out of the airport and be consumed with the fresh, cool, Irish air. All of those things I day dreamed about were real and they actually happened…..to me.
For me, the time spent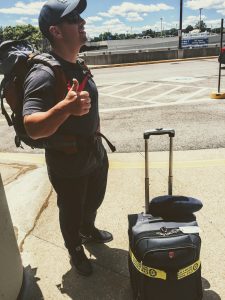 waiting for a vacation to come is almost just as fun as the trip. I’m one of those people who reads blog after blog, review after review, and comment sections galore before making a decision on purchases, but especially on travel options (that’s where the Type A Traveler comes in). The second we book, I’m on it. It drives my husband absolutely crazy, so he just let’s me take over and plan everything. Sure, some days….well, most days actually…I get antsy and time feels like it takes forever, but I get to consume my thoughts with what I’ll pack, or where we will go, what we’ll do, and all the little spots we’ll enjoy a local beer, or a cup of coffee. I’ll make lists and lay things out, but most of all..I’ll day dream incessantly about those surreal feelings I’ll have and all the new experiences I will be able to call memories.
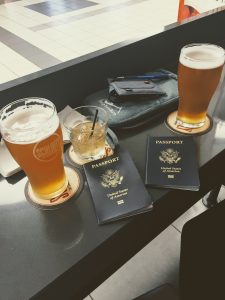
I can remember it so perfectly….my first daydream come true…the smell of the fresh, Irish air. We woke up just in time to have breakfast on flight and when I saw we’d be landing in about an hour, I could feel the excitement swelling up inside me quickly. As soon I could see exit doors at Shannon Airport, I left my luggage with Jacob and had to walk outside. I was right. I felt like I had been transported. Transported to a place that was beautiful even on a cloudy, dreary day. That was Ireland. Grey skies, cool fresh air, and the slightest smell of moisture in the air.
So, you’re probably wondering why this post is called “The Windy Gap” when I’m over here gushing over feelings, and daydreams, and all that mushy travel stuff you see in the movies. Well…this is why…
The second day we were in Ireland is that day that changed me. The day that felt like a dream. The day that lit a flame inside me that still burns and burns and burns. It was this day that I realized I could travel wherever I wanted to go. I could stop day dreaming about it and actually start doing it.
It was this day
6. 9. 16
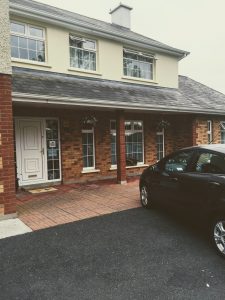
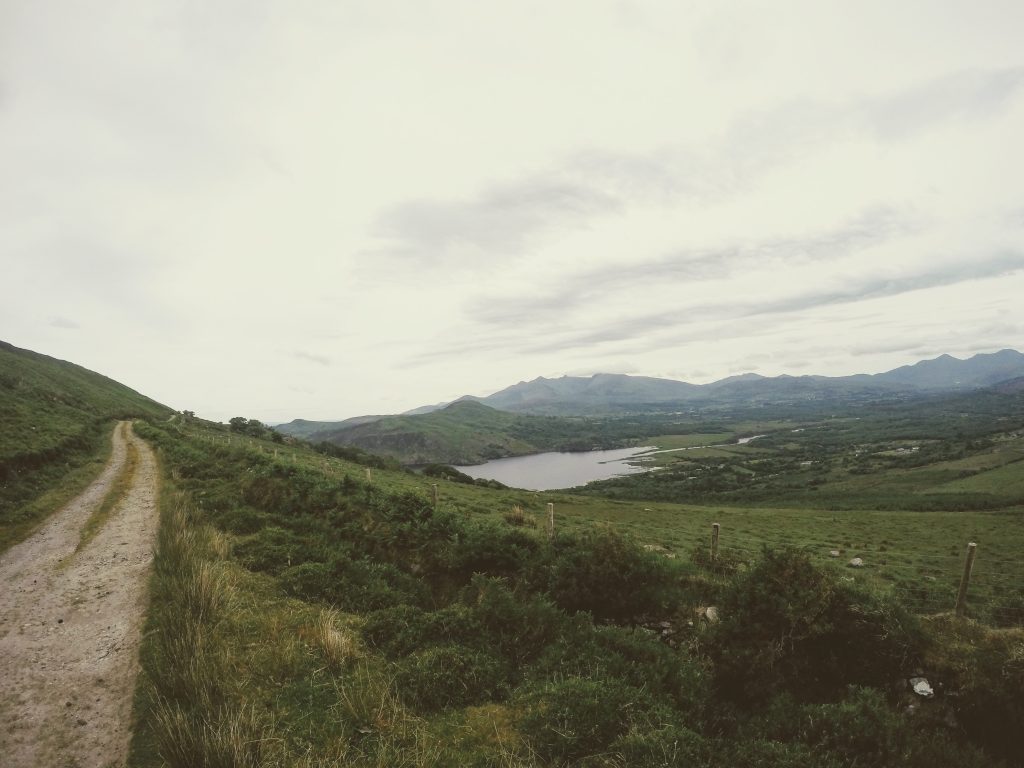
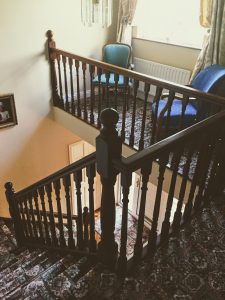 We woke up at our bed and breakfast, Carrigane House, in Limerick. We were treated to a full Irish breakfast complete with french press coffee, black pudding, bacon, eggs, and Irish brown bread all made from scratch by the owner, Maura. Before we left, I had been researching trails in Ireland that were somewhere along our planned route and I stumbled upon one that looked absolutely breathtaking. It was a bit out of our way and not in our itinerary (SO not like me), but we had to hike it. We changed plans last-minute after breakfast and headed towards Glenbeigh. Just like the day before, we were stunned by Ireland’s beauty. Just driving through small towns, along the coast, past farms, and down tiny roads is enough to make you wonder if anything in this world is as beautiful.
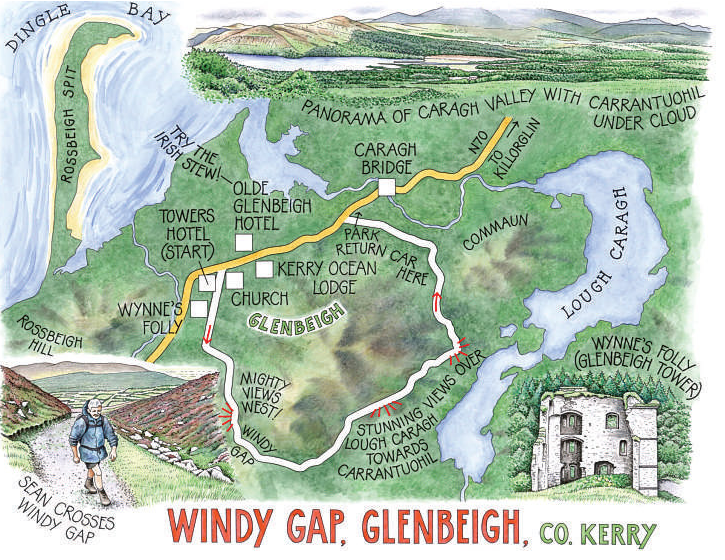
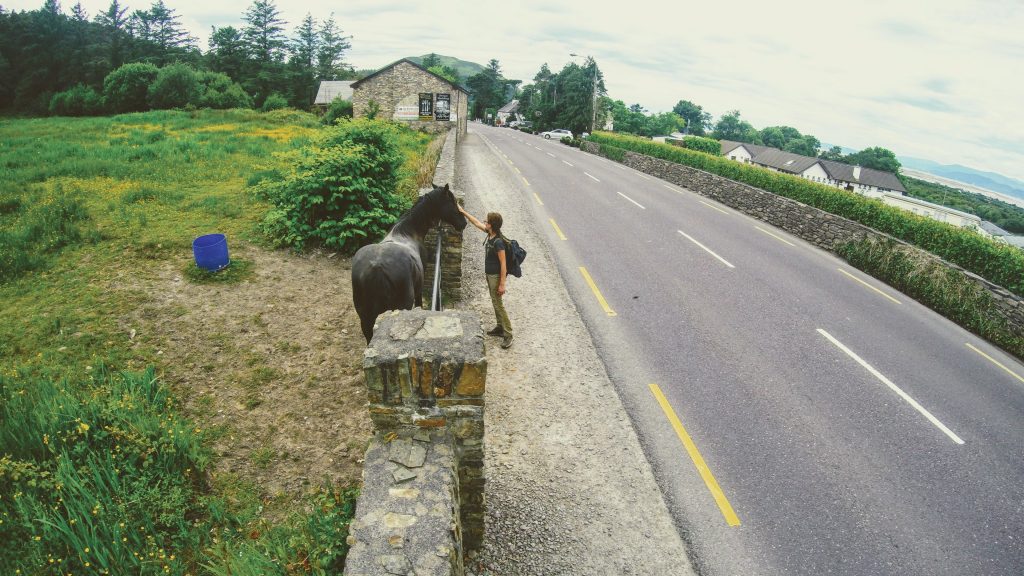
When we arrived in Glenbeigh (from N70), we parked across the street from the gas station in the centre of town and loaded up our packs. Note: you can park in the parking lot across from the gas station, next to the Towers Hotel, or you can take the risk and drive up to the trailhead where there are two parking spots. If they are taken, there’s really nowhere else to park once you are up there. I would recommend parking in town because the road up to the trailhead is quite lovely and it eliminates the risk of not having a place to park (type a people like me always think it’s better safe than sorry). Also, looking back, I feel our car was safer parked in town and the trail doesn’t end at the trailhead anyway. So, you either have to park two cars (not typically an option for most people) or park in town and just walk back through town on N70 to your car.
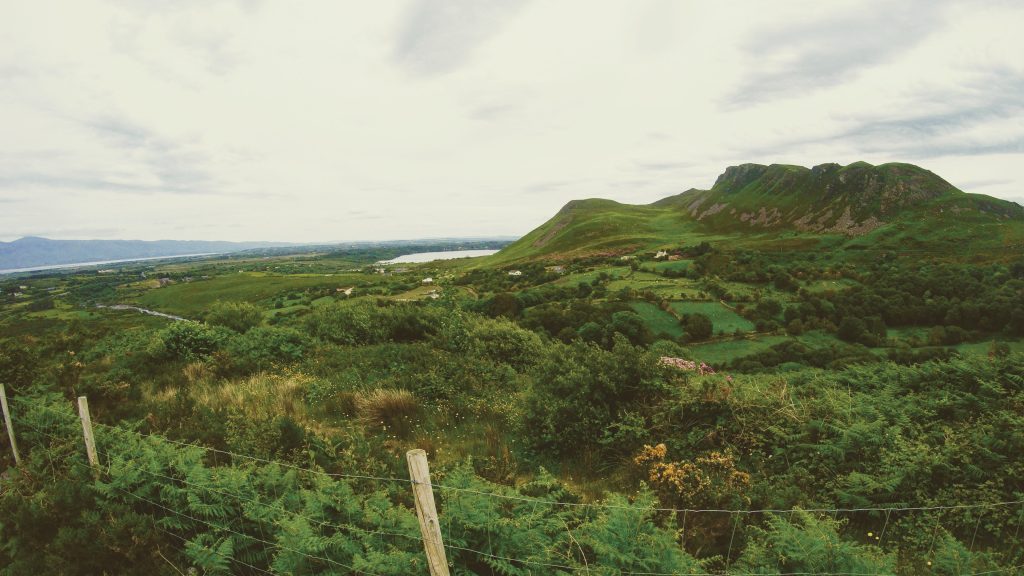
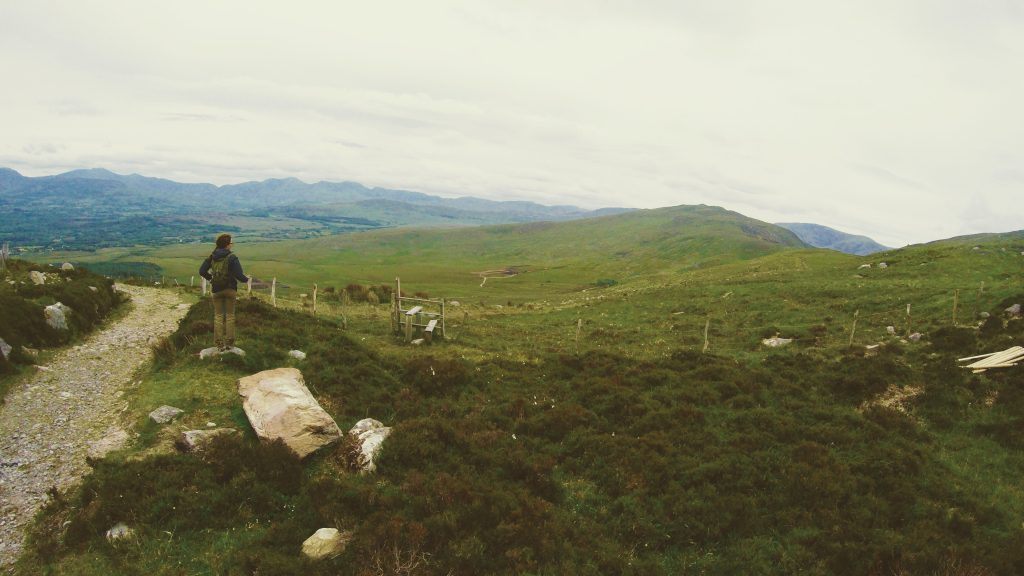
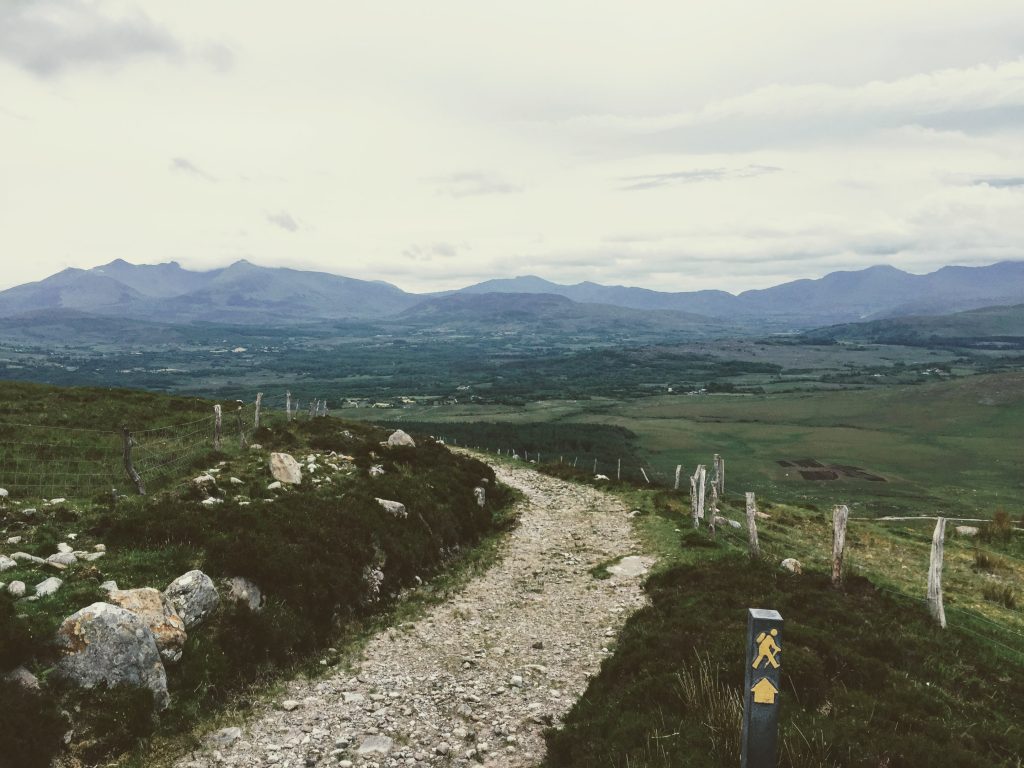
On the way up ↓↓↓
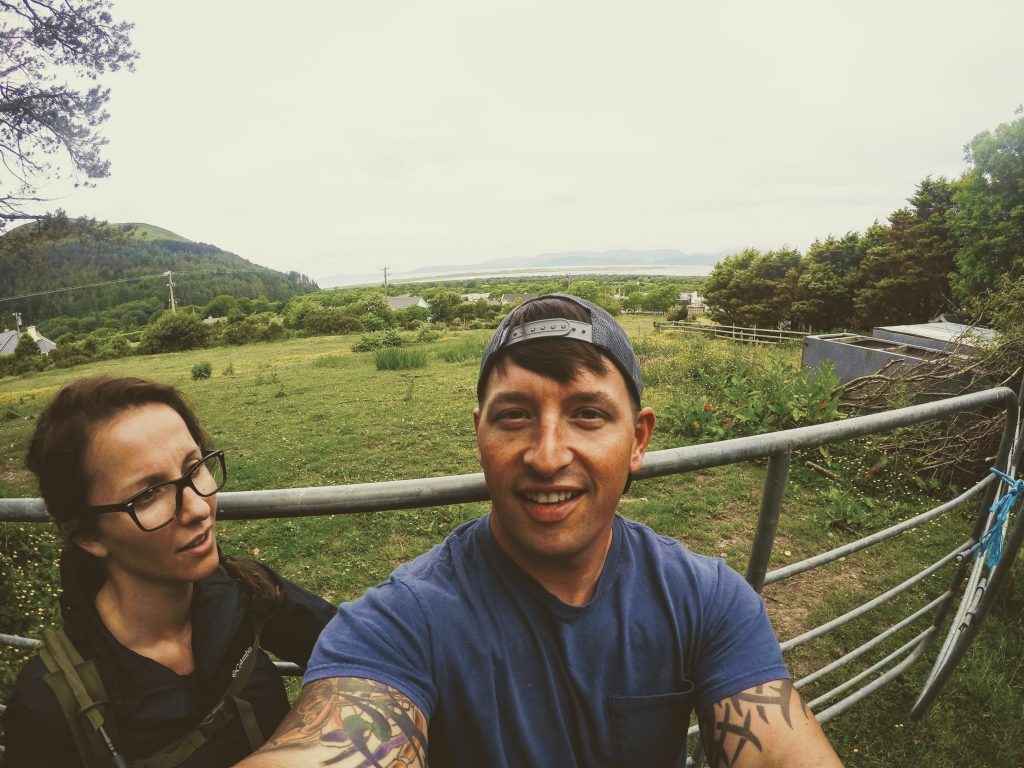

Once we got to the trailhead, we realized we had our work cut out for us. The first leg is a fairly steep incline up to the actual windy gap. I’m not going to lie…we were out of breath. We had a tough time getting up that hill to the gap after hiking up the road. If you can bring trekking poles, DO IT! Looking back, they would have been really helpful for all of our hiking in Ireland. Take your time on this hike. It is considered moderate grade and is 6 miles long round trip. It is recommended to allot 3 hours for this 6 mile hike, but I would give yourself more time to take pictures and just sit and enjoy the views. It might take up most of your day, but let it. Take it in, breathe it in, soak it up. Trust me. I would give anything to be in this moment again. We couldn’t help but to stop multiple times along the way and just smile at each other with exuding happiness. We kept saying to each other over and over again, “Babe, can you believe this? We are here. We are actually here. We made it.” Everything we had ever imagined about Ireland was real and happening…to us.
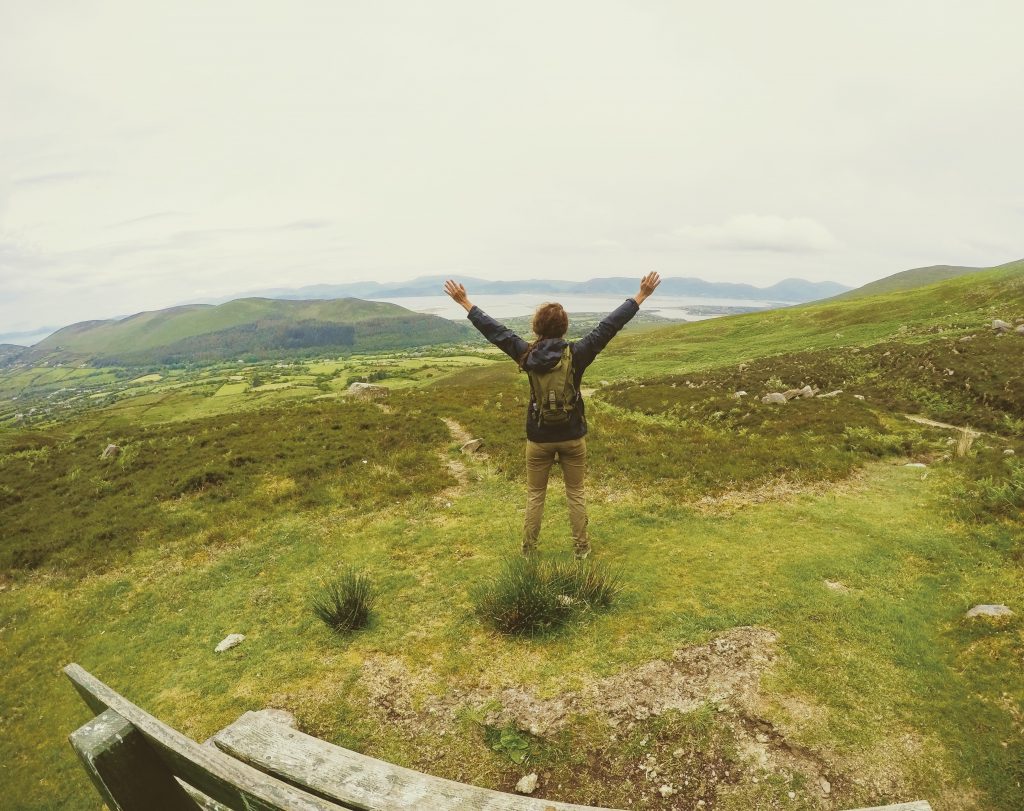
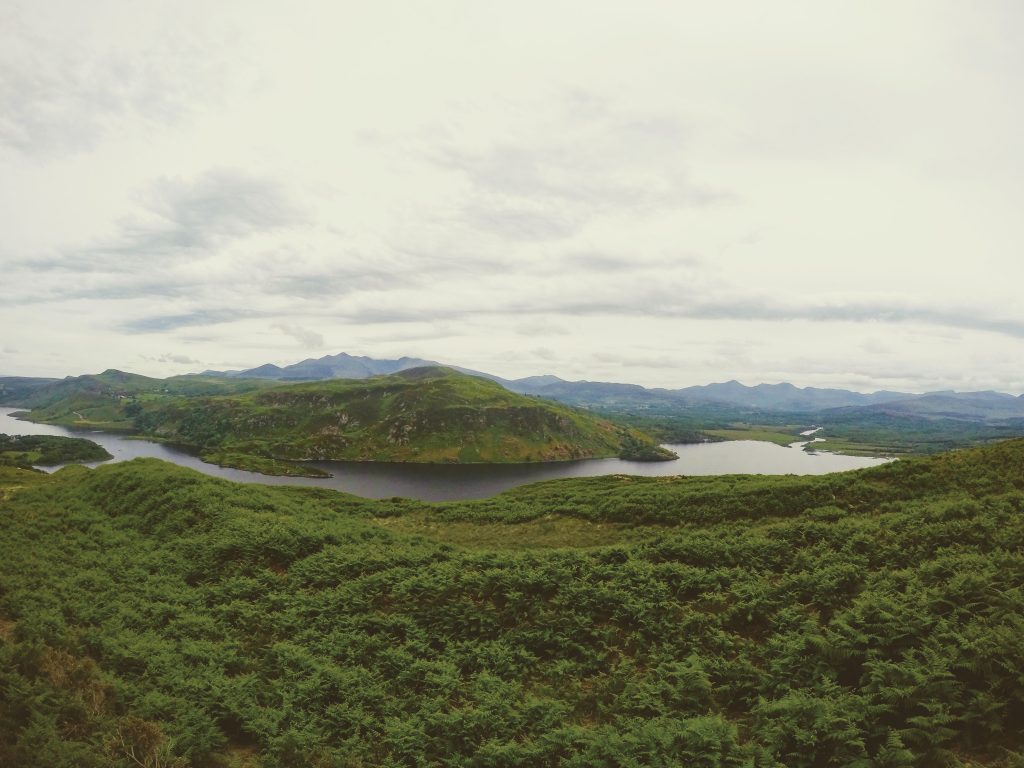
My second daydream come true…seeing green for miles. ↓↓↓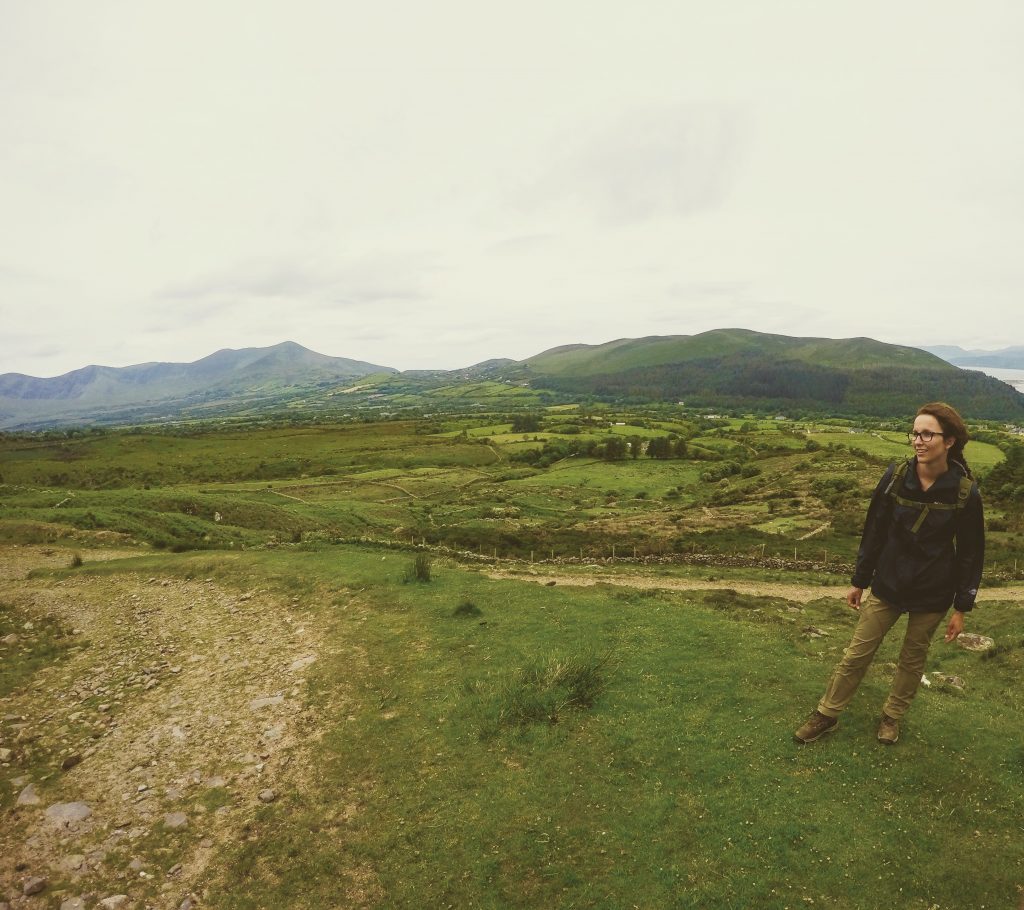
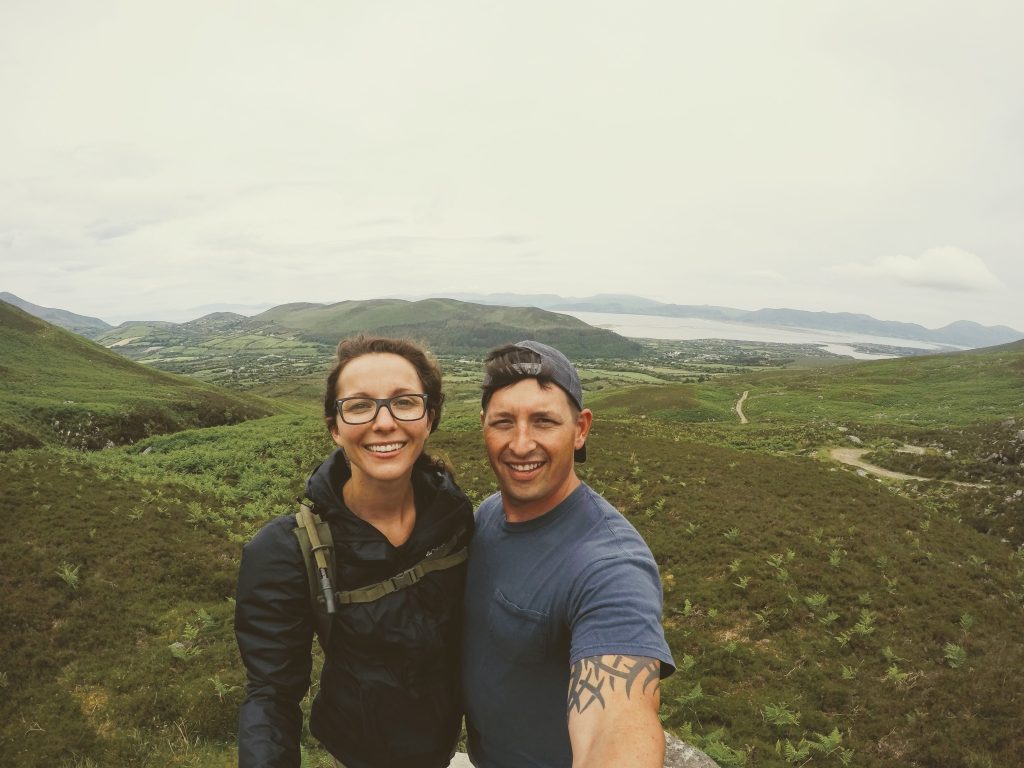
When we finally arrived at the top of the windy gap, I felt completely surrounded by beauty. The bay’s calm waters resting under a light blanket of fog, the small cottages amidst the sloping farmland, the mountain sheep scattered across the hills, and the rush of wind consuming every part of me that still needed to just let go. I thought of one of my favorite books and said to myself…
“And in that moment i swear we were infinite”
The Perks of Being a Wallflower, pg. 39, Stephen Chbosky
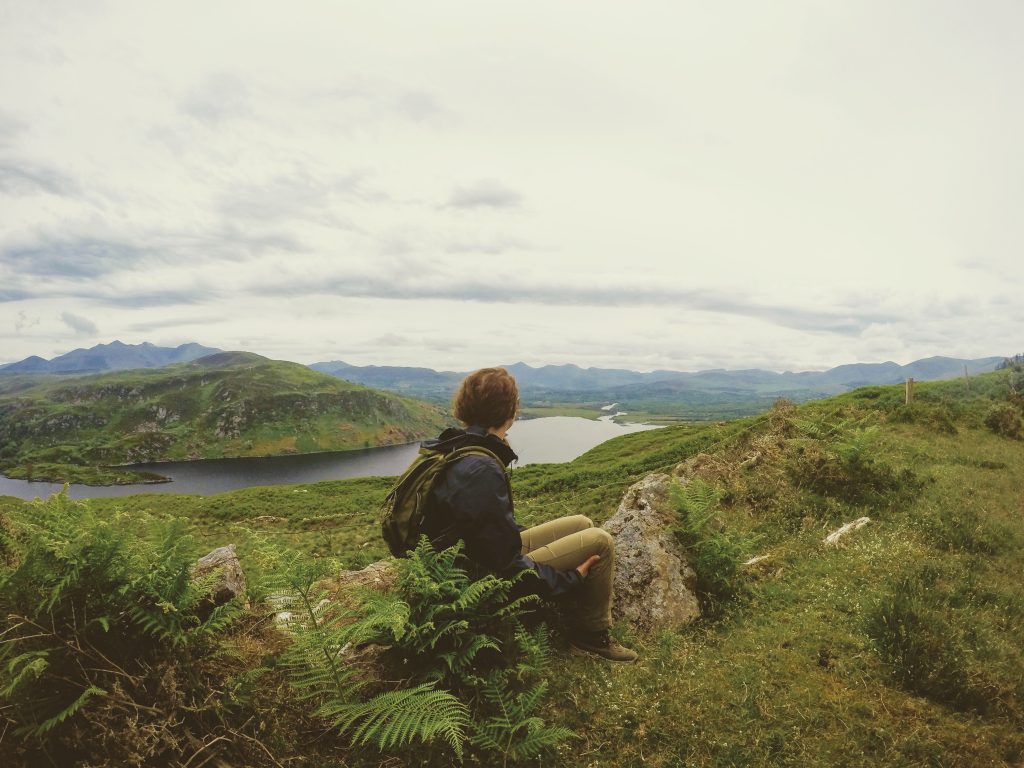
Ireland changed me. The decision to do this hike changed me. This moment changed me.
Travel is not a just a luxury for those who can afford it. Travel is for the ones who daydream incessantly of places that seem too beautiful in their imagination to actually exist. It is for the ones who want to feel as though nothing else in the world is happening except what is before their eyes in a single moment. It is for the small town girls who know they are meant to experience something greater in this life. It is for all of the people out there that fill their head with excuses about why they can’t go. It doesn’t have to be 3,000 miles away. Get in the car for a drive on a Saturday, take a weekend trip with your best friend, find a small town and go to antique shops, go for a bike ride, find a local brewery/winery, go for a day hike.
Just.Go.
What to bring:
- Hiking Boots
- Trekking Poles(optional, but recommended)
- Raincoat (this is just a must for Ireland.Period.No matter what you are doing)
- Small hiking backpack for snacks and water (5L with hydration bladder is perfect )
- Camera(all of these photos were taken with my iPhone)
Way to go:
MAP: OS of Ireland 1:50,000 Discovery 78; downloadable map/instructions at http://tcs.ireland.ie/ dataland/TCSAttachments/ 341_TheKerryWay.pdf
TRAVEL: N70 from Tralee or N72 from Killarney to Killorglin; N70 to Glenbeigh. For two-car walkers, park one car neatly up side road off N70, a quarter mile west of Caragh Bridge, and drive other car on for three-quarters of a mile into Glenbeigh. Park near Towers Hotel in Main Street.
WALK DIRECTIONS: By Towers Hotel turn up road past church (Kerry Way/KW ‘walking man’ waymark post). In one third of a mile take first lane on left (KW). Follow KW to end of tarmac, then up track to cross Windy Gap and descend to 3-way fingerpost. Keep ahead (‘Scenic Route’) to reach road and follow it down to N70 and return car near Caragh Bridge.
LENGTH: 6 miles: allow 3 hours
GRADE: Moderate
CONDITIONS: Good tracks and country roads
http://www.independent.ie/life/travel/ireland/walk-of-the-week-windy-gap-co-kerry-26569883.html
It’s often the bane of the international traveler’s existence, the thorn in his/her side, the unscratchable itch. It’s the dreaded international data charge! These days, humanity is more connected than ever, with smart phones and tablets being more of an appendage than an accessory. The long storied problem with staying connected on international travel is quite simply, the exorbitant cost.
Data roaming charges can easily leave you facing a four-figured cell phone bill upon returning from your travels. And, while times are changing in the mobile industry, you can still very easily “buttonhook” yourself if you don’t go in prepared.
In this entry, I’m going to discuss some of the ways that we’ve had the best success with staying connected during travel, and how we’ve managed to keep the costs at an affordable level.
First, let’s talk about why you would need to be connected abroad. Some of you may be thinking, shouldn’t vacation be a time when you unplug, exhale, and recharge? In a word, ABSOLUTELY! But, there are reasons that still having some access to the worldwide web can make your travels much more streamlined. I’m going to quickly delve into a few reasons why having mobile access abroad is a GOOD THING. Those reasons are:
- Navigation – If you travel like we do, we often travel on our own via train, rented car, or on foot. Having access to a bit of mobile data can be major when it comes to the efficiency of your trip. Being able to access a mapping or transit app on your phone can save tons of time over wandering around lost or aimless.
- Emergencies – You never know what you’ll encounter during your next adventure or what may happen with friends and family while you’re away. While an emergency situation would warrant contact no matter what the cost, not having the added stress of a giant phone bill in addition to the emergency only helps the situation.
- Research – This again relates to traveling on your own. As our train approaches its next stop, or as we come over a mountain pass and happen upon a small town in our rental, it’s really handy to have a web browser to perform a quick search to decide whether or not the town is worth the stop.
While we’re definitely advocates of leaving social media, email, and work behind for your adventure, we certainly see some benefits to having a usable phone that won’t cost you an arm and a leg to utilize. That said, let’s discuss a few of the ways that you can stay connected and avoid those unbearable international roaming charges.
First, the key to being able to connect overseas at all is having a global capable phone that is unlocked by your U.S. mobile provider. To confirm that you have a global phone that is in an unlocked state, contact your mobile provider.
Types of SIM Cards
- Local SIM Cards – Often, the cheapest way to connect abroad is to connect like a local. Most countries (especially in Europe) have mobile providers with prepaid mobile plans. In Europe, Vodafone and T-Mobile are basically everywhere at this point. You can simply walk in to a local carrier’s store, check out plan options, by a prepaid plan, and insert the local SIM card in your unlocked global phone. There are a couple of major keys here. 1) Don’t lose your U.S. SIM card. Make sure to put it in a safe place, so that you can replace it when you’re back stateside. 2) Make sure that you know what plan you’re purchasing, and that it will be enough to get you through your trip. As an example, our last trip to Ireland was 10 days long, and we were driving on our own in a rental. We purchased a Tesco Mobile prepaid SIM card for the equivalent of about $20 USD. This SIM card included 2GB of data to be used anywhere in Ireland and unlimited calls and texts within Ireland. That was more than enough to get us by. We just made sure to shut our data off when not in use.
- Global SIM Cards – Our next trip will take us through 5 countries. This would mean purchasing 5 different SIM cards to avoid roaming charges in Europe. In this case, we’ve opted to utilize a Europe SIM card by Mobal. This card is $60 per month for 1GB of data, but it works all over Europe. Additional GB of data are $10 each. While this isn’t as good of a deal as the Irish SIM card, the fact that it works in every country that we’re traveling to makes it a more convenient and better deal than buying 5 different SIM cards. There are various companies offering Global SIMs at varying rates. Check out options like Mobal, OneSIM, etc., and find what works best for you. These SIMs work in the same way at the local SIMs. Simply swap them out for your U.S. SIM card, restart your phone, and you’re good to go. Do be aware that when you change SIM cards, you also change your phone number, leaving your U.S. number suspended while you travel.
- Carrier SIM Cards – As the U.S. mobile phone market competition heats up, using your existing U.S. plan is becoming more and more of an option each day. Companies like T-Mobile are already offering unlimited international data in many countries. Sprint has free use in many Caribbean countries, and Verizon in Canada and Mexico. Additionally, Verizon is offering daily international passes for $10 per day. This allows you to use your existing U.S. package for only $10 per day, with no additional roaming fees. For short trips, this can be an affordable an convenient option. My warning with these plans is to just be sure of the details and fine print. We tested T-Mobile’s unlimited international data last year, and while it was unlimited, the speeds were restricted to 2G, which in many locations was unusable.
I often see social media posts and online advice to simply put your phone in airplane mode when you leave the states. While that is an option, there are definitely some better options out there to stay connected while you wander. Choose carefully, as there’s not a one size fits all option. Just be prepared, and you can have the peace of mind of staying plugged in abroad.
A friend directed a question my way today. His question was, “Which credit card for earning miles would you suggest?” Some of you may know that Stephanie and I manage to keep feeding our travel addiction by flying almost exclusively on awards flights. If not for flying free, we plainly couldn’t afford to travel as much as we do. I thought I’d post my response to my friend as a blog entry to help give you all an idea for how we manage to hoard the miles that we do. This entry isn’t an all encompassing explanation, but it does give an overview of why points are worth more in one place than another and why more points isn’t always better. Here’s my response:
Your question of “best credit card for earning miles” couldn’t have a more convoluted answer. Let me know if this makes any sense at all. I tried to make it as clear as I could.
I use these sites to keep up with the latest offers:
The three cards that I’d consider right now would be:
- Chase Sapphire Preferred
- Chase Sapphire Reserve
- Chase Freedom Unlimited
Chase Sapphire Preferred – I carried this as my main points earning card for 5 or so years. It’s $95 a year, and I think the first year is free. There’s currently a 50,000 point signup bonus if you spend $4000 in 3 months. Perks of this card:
- 1 point per dollar spent on all transactions
- 2 points per dollar spent on travel and restaurants
- Points transfer 1:1 to United, British, Southwest, and a few other airlines.
- Includes some free travel insurance and car rental collision insurance.
- No foreign transaction fees
- 25% bonus on travel booked through Chase travel site. (100,000 points is worth $1000 cash, but is worth $1250 in travel through Chase)
Chase Sapphire Reserve – I currently carry this card. I opened it because it had a 100,000 mile signup bonus. It currently is $450 per year and has a 50,000 point signup bonus if you spend $4000 in 3 months. Perks of this card:
- If you spend $300 per year on travel, you get a $300 statement credit. This lowers the annual fee to $150
- Includes free priority pass airport lounge membership.
- Includes free travel insurance and car collision insurance.
- Includes $100 credit for TSA Pre-check or Global Entry fee
- 1 point per dollar spent on all transactions
- 3 points per dollar spent on travel and restaurants
- 50% bonus on travel booked through Chase travel site. (100,000 points is worth $1000 cash, but is worth $1500 in travel through Chase)
- Points transfer 1:1 to United, British, Southwest, and a few other airlines.
Chase Freedom Unlimited – I currently carry this card. I actually downgraded my Chase Sapphire Preferred to this card to avoid the annual fee and maximize my points. This card has no annual fee. It probably has a small signup bonus as well. Perks of this card:
- No annual fee
- 1.5 points per dollar spent on all transactions
Con of this card:
- You cannot transfer these points to airlines; however, you can transfer them to another Chase card and then to airlines. (i.e. Freedom to Reserve. Reserve to airline)
Right now, I carry two cards:
- Chase Sapphire Reserve
- Chase Freedom Unlimited
The reasoning for carrying two cards is simple. There is only a fee on one of them. I keep the Sapphire Reserve open because I need it to transfer points to airlines (points are worth more with the airlines). Also, it gets 3 points per dollar on dining and travel. I keep the Freedom Unlimited open and use it for all purchases that aren’t restaurants or travel because it gets 1.5 points on all purchases.
The two cards that I’d suggest RIGHT NOW are:
- Chase Sapphire Preferred
- Chase Freedom Unlimited
I think the Sapphire Reserve is probably the best card going right now, but it’s an investment. $450, then you have to spend $300 on travel to offset that fee. Easily doable, but you have to front the $450. But the perks are huge. The reason I suggest the Sapphire Preferred over the Sapphire Reserve right now is because the signup bonus on the reserve was cut in half. So, you can get the same signup bonus with either card right now and only front $95 with the Preferred Card. If you need another signup bonus for a boost in 6 months, sign up for the Reserve too and cancel or downgrade the Preferred.
You may see people suggesting cards like Capital One because they have 3 points per dollar spent. Here’s why that’s a bad idea in my opinion. Capital One only lets you use miles within Capital One. You can’t transfer them to airlines. Here’s why transferring points to airlines is really important.
Let’s say you have 120,000 points in Chase or Capital One.
Inside of Chase or Capital One, 120,000 points is worth $1200. If you have Chase Preferred, it’s worth $1500 on travel. If you have Chase Reserve, it’s worth $1800 on travel.
But, if you have one of the chase sapphire cards, you can transfer those points to United Airlines. United Airlines currently charges 120,000 points for 2 roundtrip tickets from anywhere in the US to anywhere in Europe. So, you could book a flight with United that costs $3000, and it costs you 120,000 points. So, now, with United, those points are worth $3000. In Capital One, they’re only worth $1200, and inside of Chase, they’re worth $1800 at most. This is why 3:1 points from Capital One isn’t as good of a deal as it seems, because Capital One traps those points inside their own travel service. The other issue is that inside of Chase and Capital One Travel Portals, airfare is generally more expensive than booking straight through the airline. So, you may see a flight for $800 on United.com, but inside of Chase or Capital One it’s $1100.
Long story short, I carry 2 cards to maximize my miles. If we want to travel, and we’re short, we find another card with a signup bonus that will transfer to the airline we need it to. For us though, Chase has been where we’ve focused most of our efforts.
Hope that helps.
Novice travelers to Europe often have a bit of trepidation when it comes to obtaining local currency abroad. While there are several solutions to this dilemma, I thought I’d take a moment to discuss what we’ve found to be a best practice in getting Euros, Franks, Pounds, etc. across the pond.
There are few methods that are often suggested when it comes to obtaining foreign currency. Some of the most common methods are:
- Buying currency from your local bank prior to travel.
- Using a currency exchange in your destination country.
- Buying foreign currency from an online exchange.
- Using your ATM/Debit card abroad.
Before discussing what we view to be the BEST option, I’d like to discuss the reasons that the others are less desirable.
Buying currency from your local bank prior to travel: While this method may give you peace of mind and prove convenient, we see a couple of issues here. First, exchange rates generally aren’t that favorable when using your local financial institution to change money. In many cases, local banks don’t keep foreign currency on hand, so they are actually buying the currency from a larger institution. This means that you are not only paying the exchange rate and spread being offered by the larger institution, you’re paying an additional fee to your local bank.
Using a currency exchange in your destination country: This is another convenience option that may prove costly. I mean, what could be easier than arriving at the airport in your destination country, walking to the exchange desk, and getting some local cash? Truth be told, our PREFERRED METHOD is just as easy, and far less costly. Currency exchange desks are notorious for charging exorbitant fees in excess of the exchange rate. This just means that you’re paying more for your own money than it’s worth.
Buying foreign currency from an online exchange: Similar to purchasing at your local bank, this is an option that provides peace of mind and convenience. It’s nice having that currency before you head abroad, but this method will almost always cost you in terms of convenience fees in excess of the exchange rate.
Before I discuss our preferred method for obtaining foreign currency, I wanted to discuss a little bit of the terminology surrounding currency exchange and the spread charged by exchange companies to make money off of you. At the time of this blog entry, the published exchange rate from USD to Euros was 1 USD to 0.929347 EUR per www.xe.com. As such, $100 is worth 92.93 Euros. If you were to order 93 Euros on Travelex.com, it would cost you $110.71, plus a $9.99 delivery fee. So, you paid $120.70 for $100 worth of Euros.
If you do plan to utilize currency exchange desks abroad, we suggest installing phone apps like Coinverter Currency Converter, so you can see what you should be paying at the going rate vs. what the exchange desk will charge you. This app can be loaded and updated, then used offline. This is helpful if your phone is in airplane mode abroad. Just make sure to refresh the app before turning your phone data off so you have the most recent exchange rates possible.
Now, let’s discuss our preferred option……
Using your ATM/Debit card abroad: In almost all instances, we’ve found the cheapest and most convenient way to get cash abroad (specifically in Europe) is by using ATMs and the debit/atm card associated with your American bank account. Why is this the best, you ask? Well, EVERY ATM that we’ve encountered in Europe has not charged a fee for cash withdrawal. Additionally, every ATM that we’ve used in Europe also dispenses cash with no spread on the exchange rate. So, provided that your bank charges no or low foreign ATM fees, this can be a really cheap way to get cash when you travel. For this to be your best bet, you need to be sure that you’ve got your bases covered. Here is our list of tips for using your ATM to get cash:
- Know what your bank charges for using foreign ATMs. (Ours is $1 per transaction)
- Know if your bank charges additional fees for international charges. (Ours doesn’t)
- When using a foreign ATM, make sure that you know whether or not it charges a fee. (We’ve not seen any that charge fees in Europe)
- When the ATM gives you the option to withdrawal cash in the local currency or in your native currency, ALWAYS choose the local currency. This simply means that the foreign ATM will not perform an electronic currency conversion for this withdrawal. If you let the foreign ATM perform the currency exchange, you’ll get charged a fee.
- Know the exchange rate. Know what this withdrawal should cost you in USD.
- Always check for card skimmers placed with scammers trying to steal your card information.
- Always let your bank know that you’ll be traveling abroad to avoid having your card locked for a foreign transaction.
- Make sure to know your daily ATM withdrawal limits.
In our experience, we’ve always gotten the exact going exchange rate when using our ATM card to obtain cash in Europe. This, or course, is provided that we always chose for the machine to issue cash at the local currency rate. We simply pay $1 per transaction, as that is the only fee charged by our bank for international ATM usage.
It’s always best to explore all options when exchanging cash abroad, but we think that if you are informed from the start and follow our tips above, you can save yourself time and money.
Let us know your experience with currency conversion below. We’d love to hear if you agree, disagree, or something in between!
The common perception (and misconception) these days is that using a travel agent costs you money. You may be surprised to know that using a travel agent may actually SAVE YOU MONEY.
One specific type of travel where using an agent can save you money is cruising. Did you know that travel agencies reserve group space as soon as cruise itineraries are released in order to lock in pricing? That’s right! We have group inventory on hundreds of cruise vacations with pricing that may be lower than you see online….even directly through the cruise line!

Not only that, our group space also includes special amenities and perks for our clients that you won’t get by booking direct! Don’t be surprised if our lower prices also include onboard credit, special gifts to your stateroom, and more!
While some travel agencies charge booking or consultation fees, that’s simply not the way we do things at McCombs Travel Company. When you book your next cruise with us, you’ll pay the same or less than the prices advertised by the cruise lines themselves, period. Plus, you’ll get hands on client assistance that can’t be beaten.
We can’t wait to help make your next cruise vacation the best one yet. Contact us today to start planning!

Welcome to the all new McCombsTravel.com, and welcome to our new Blog! We’ll be utilizing this space to share tips and tricks with you, as well as personal travel experiences. Our goal in this is to a) give you a taste of our travel expertise, and b) to make you better prepared, more informed travelers.
If there is a topic or subject that you’d like us to post on, please comment on this post, and we’ll do our best to add content that’s helpful to you.